Now that we’re able to create a simple button in Kanzi, let’s have a go at creating a more advanced button!
Container Setup
Nested under your Screen node, start by creating a new Empty Node 2D called “Root”.
Nested under Root, create another Empty Node 2D called “MyButton”. Immediately prefab MyButton!
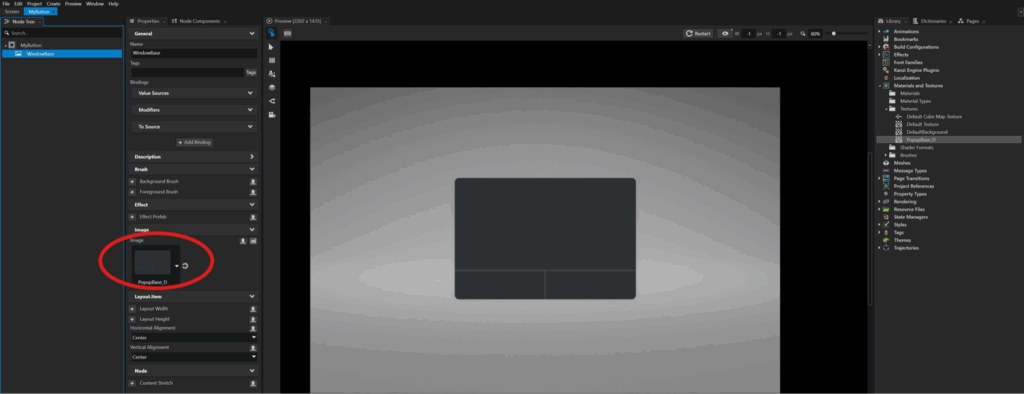
Next, underneath MyButton, create a new Image node called “WindowBase”.
- Set the image texture to the base of our window.
- Horizontal/Vertical Alignment: Center, Center


Temporary background
Consider setting the Background Brush of MyButton to DefaultBackground in order to make our button easier to see!
Adding window text
Like the simple button we made previously, let’s add text for the title and body of our button window.
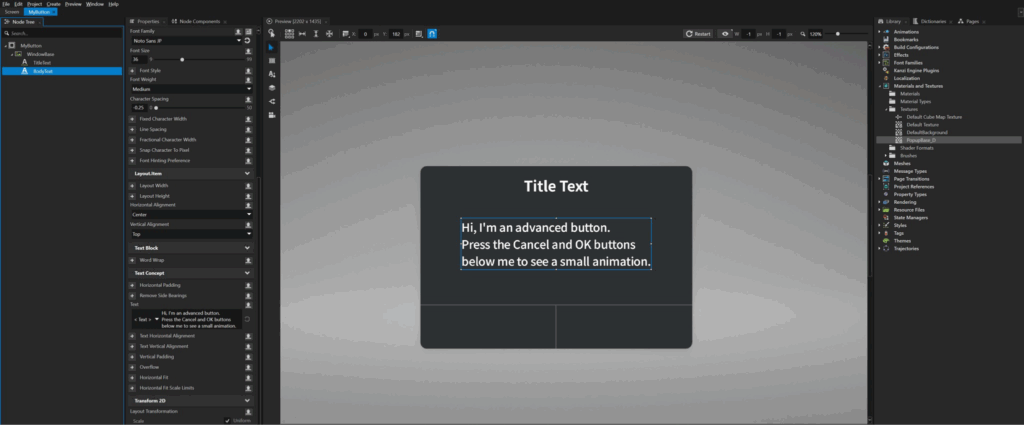
Nested inside WindowBase, create two Text Block 2D elements.
TitleText
- Horizontal/Vertical Alignment: Center, Top
- Layout Translation: ~ 0,35
BodyText
- Horizontal/Vertical Alignment: Center, Top
- Character Spacing: -0.25 (to squeeze the text together a bit)
- Layout Translation: ~ 0,180

Noto Sans JP
The Font I’m using for this button is Noto Sans JP, which is a nice-looking font you can download for free from Google Fonts!
Creating the Left Button
Next, let’s create the actual buttons at the bottom of our window! We’ll create our left button first and then duplicate it over to the right once we’re done.
Nested inside WindowBase, create a Button2D note called “ButtonLeft”.
- Horizontal/Vertical Alignment: Left, Bottom
- Tweak the Layout Width, Height and Translation values to fit the button “hitbox” nicely within WindowBase.
Nested in ButtonLeft, create a Text Block 2D element called “ButtonLeft_Text”. Adjust its positioning values and color it blue.

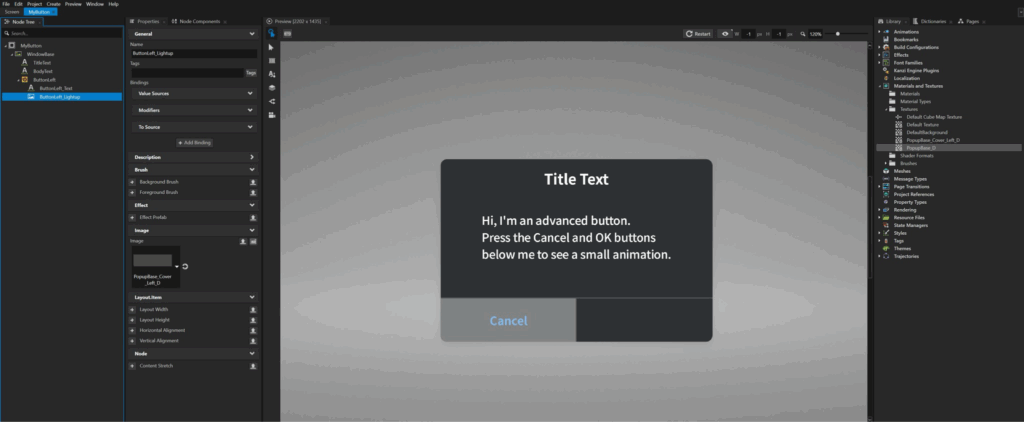
Next, create a new Image called “ButtonLeft_Lightup” nested with ButtonLeft.
The texture for this Image will be a semi-transparent color block in the shape of the left button – when overlaid on the window, the button area appears brighter. The Lightup should only be visible when the left button is pressed!

a grey rectangle with a rounded, alphaed corner
Controlling Lightup with a State Manager
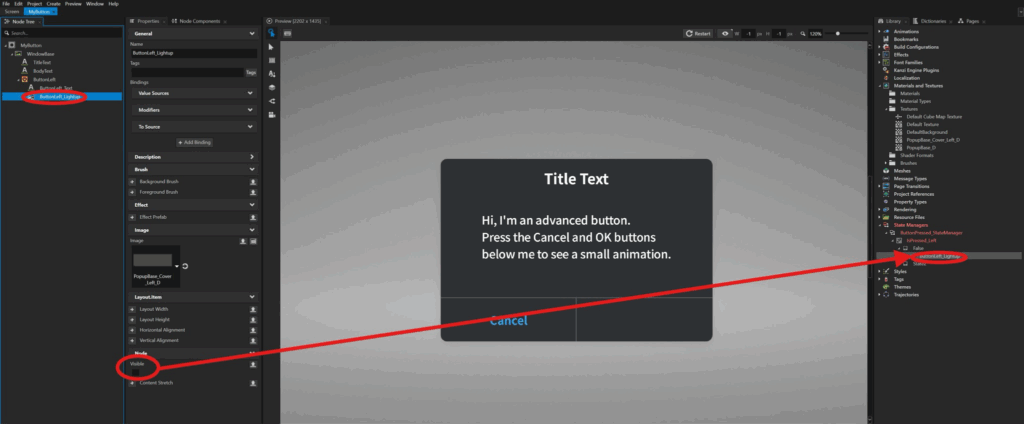
Inside your Library, create a new State Manager called “ButtonPressed_StateManager”.
Rename the default State Group to “IsPressed”.
- Inside the Controller Property dropdown, select Is Down (ButtonConcept.IsPressed).
Rename State1 to “False” and delete the default State2.
Create a new State Object inside False.
Rename this to “ButtonLeft_Lightup”.
- Set the Target Object Path to “ButtonLeft_Lightup”.
In ButtonLeft_Lightup (the Image note in your Node Tree), add the Visible property.
Then drag the newly added Visible property from your ButtonLeft_Lightup image to your ButtonLeft_Lightup state object.
Now check:
- Inside your False State: Is Down = false
- Inside your False/ ButtonLeft_Lightup State object : Visible = false
Now duplicate your False state and rename it to “True”. Check:
- Inside your True State: Is Down = true
- Inside your True/ButtonLeft_Lightup State Object: Visible = true
And then drag your ButtonPressed_StateManager onto your ButtonLeft node in the Node Tree.
Now when you press down on the left button, it should light up!
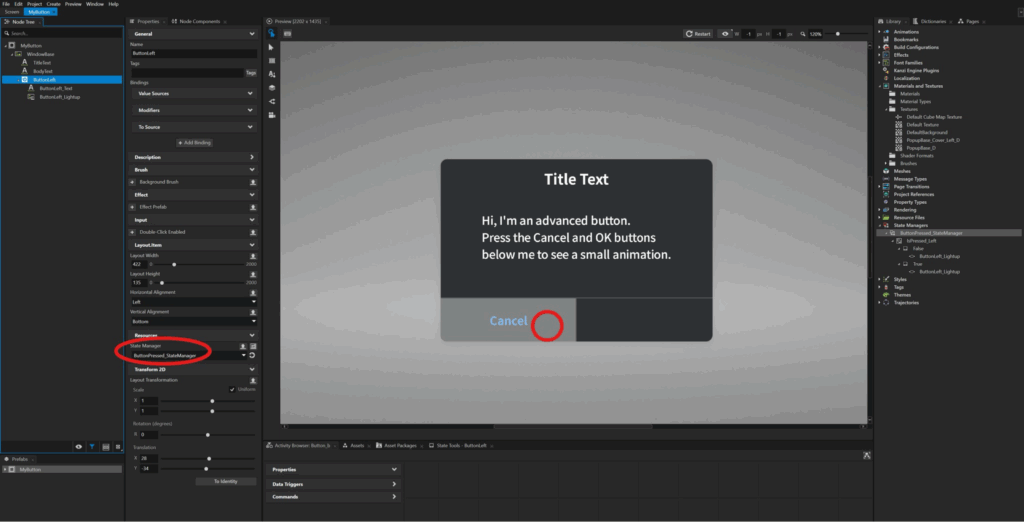
Create the Right Button
With our left button working nicely, let’s duplicate it over to create our right button!
- Rename all the nodes to fit the right side.
- Change the Lightup image texture to fit the right side (it’s just a mirrored version of our left side).
Duplicate your IsPressed_Left State Group and rename it to “IsPressed_Right”. Rename all the newly created state nodes accordingly.
In the State Objects, be sure to change the Target Object Path to ButtonRight_Lightup!
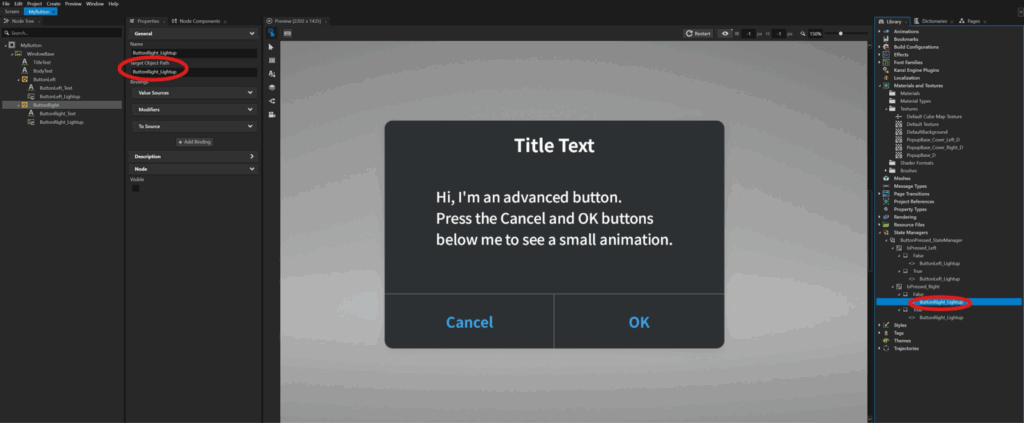
Now both our buttons are able to be pressed and they light up – great!
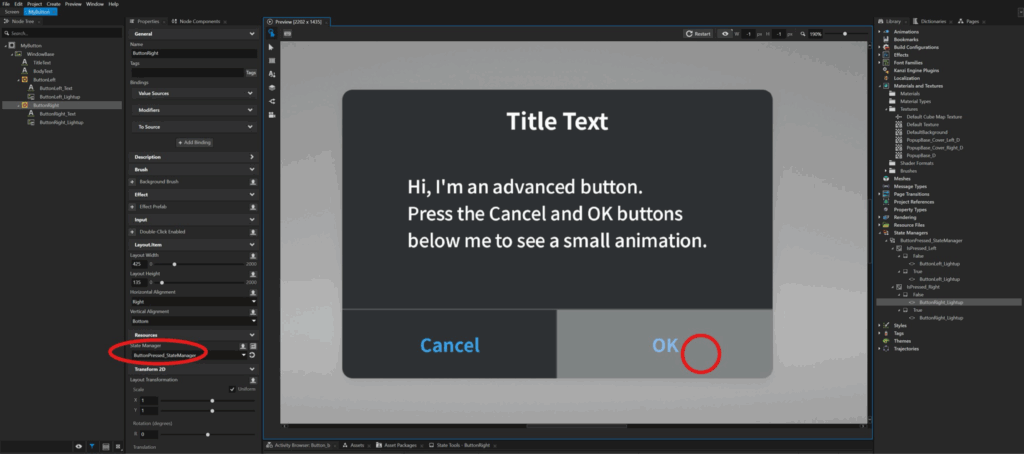
And so, that’s how you make a more advanced button in Kanzi!
We went through setting up the container, adding text, and making interactive left and right buttons that light up using a State Manager.
