Starting in a blank project, let’s try making a simple button in Kanzi Studio!
Container Setup
Nested under your Screen mode, start by creating a new Empty Node 2D called “Root”.
Nested under Root, create another Empty Node 2D called “MyButton”.

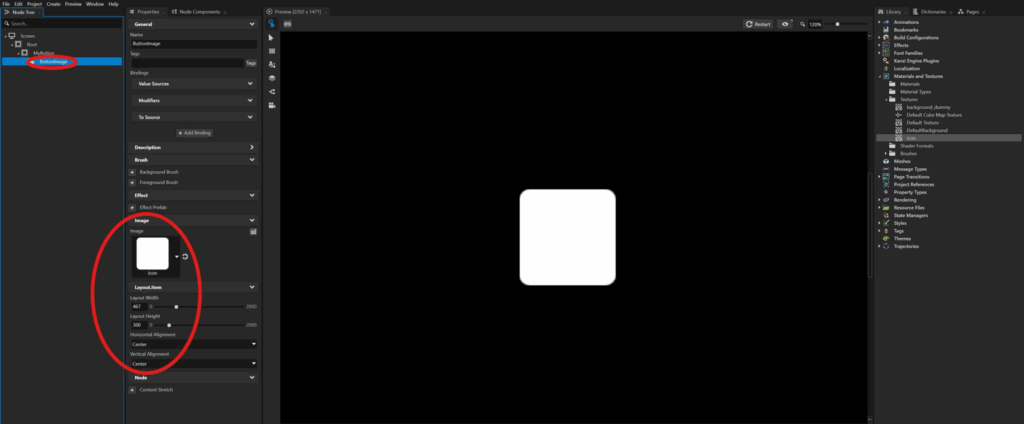
Nested under MyButton, create an Image node called “ButtonImage”. This image is basically just a white square with white, alphaed corners.
- set the Layout Width and Height to resize the image.
- set Horizontal and Vertical Alignment to Center for a button that’s in the middle of our screen.
Nested under BottomImage, create a List Box Item Container 2D called “ItemList”.
- Horizontal/Vertical Alignment: Center, Top
- Adjust Layout Width and Height so we have enough space to fit all our elements. Since our button image is 467×300, let’s give our ItemList dimensions of 300x 300.
Adding window text
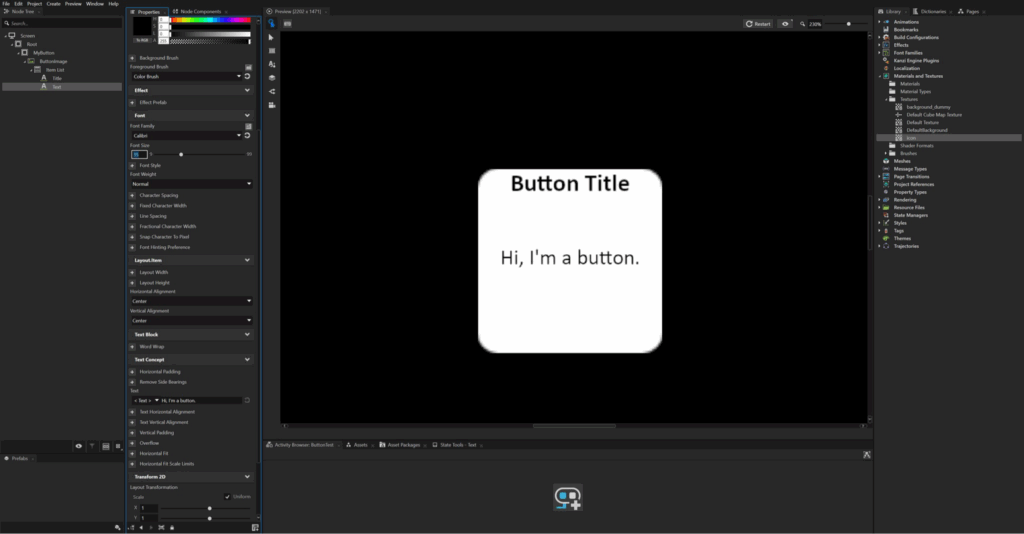
Nested under ItemList, Create a Text Block 2D called “Title”. Adjust the various font settings to tweak how our title looks.
- Horizontal/Vertical Alignment: Centre, Top
- You can use the Layout Transformation property to slightly translate the text down along the button (Y-axis).
Duplicate Title and rename it to “Text”. This is like the body text of our button window.
Adjust its properties to change the look.
- Layout Translation: 0,0
- Horizontal/Vertical Alignment: Center, Center
Adding window text
Nested under ItemList, create a Text Block 2D called “Title”. Adjust the various font settings to tweak how our title looks.
- Horizontal/Vertical Alignment: Center, Top
- You can use the Layout Transformation property to slightly translate the text down along the button (Y-axis).
Duplicate Title and rename it to “Text”. This is like the body text of our button window.
Adjust its properties to change the look.
- Layout Translation: 0,0
- Horizontal/Vertical Alignment: Center, Center
Adding divider lines
It’s easy to create divider lines for our button window!
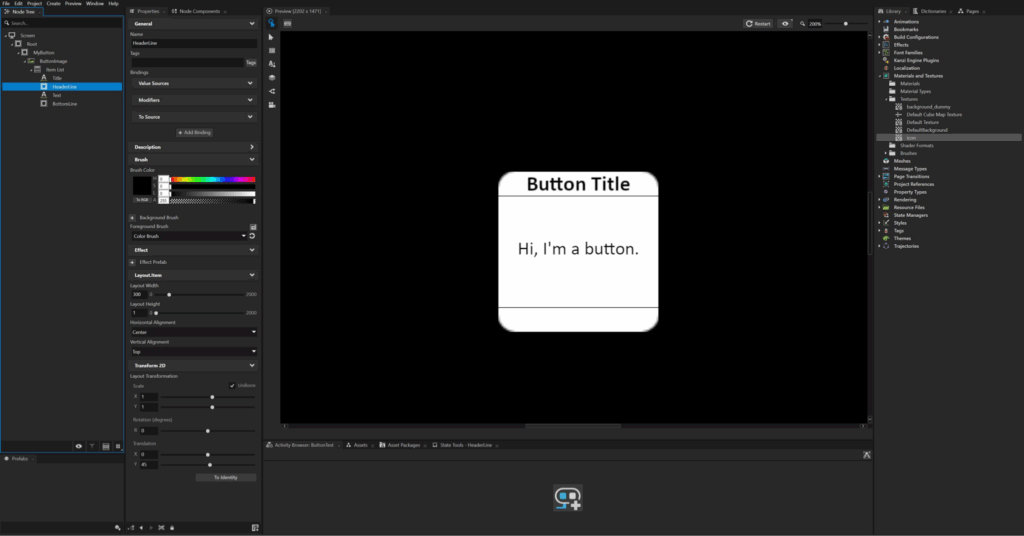
Nested under ItemList, create a new Empty Node 2D called “Headerline”.
- Foreground Brush: set to a black Color Brush.
- Layout Width/Height: ~ 300,1 (a small Height value for a thin line)
- Horizontal/Vertical Alignment: Center, Top
- Layout Translation: ~ 0,45 (to offset downwards from the top of the window)
Duplicate HeaderLine and rename it to “Underline”.
- Horizontal/Vertical Alignment: Center, Bottom
- Layout Translation: ~ 0,-45 (to offset upwards from the bottom of the window)
Adding the button
Nested under ItemList, create a Button 2D called “OKButton”.
- Layout Width/Height: ~ 250,45
- Horizontal/Vertical Alignment: Center, Bottom

Button background colour
As you adjust the positioning of your button, consider giving it a temporary background color to make it easier to see!
Nested under OKButton, create a new Text Block 2D called “ButtonText”.
- Foreground Brush: change this to some Colour Brush colour you like.
- Horizontal/Vertical Alignment: Center, Bottom
- Layout Translation: ~ 0,6
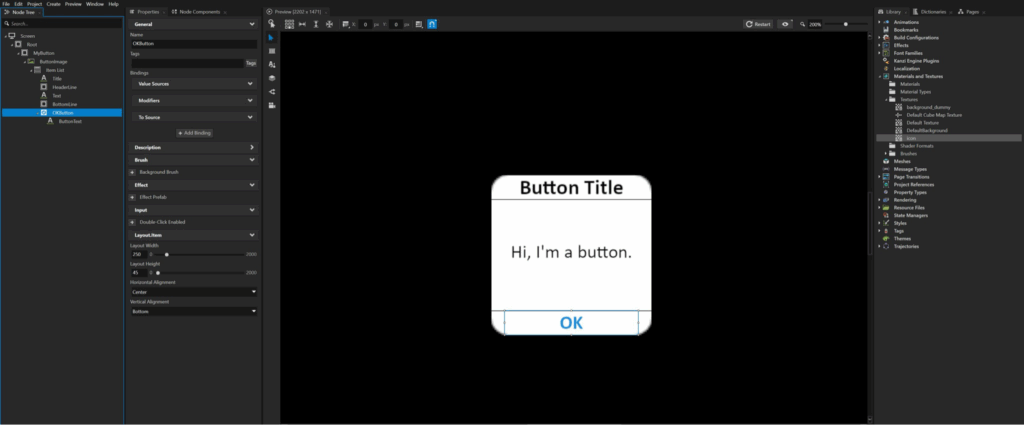
Adding button functionality
Our button currently doesn’t do anything!
Let’s make it so upon pressing OK, the entire button window disappears.
Selecting OKButton, go to Node Components / Triggers / Button: Click / Actions. Right-click and create a new Set Property action.
- Target Item: Drag in MyButton.
- Target Property: set to Visible (Node.Visible).
Now when you click OK in Interaction mode, your entire button window will disappear!


Convert MyButton to a prefab
Take this moment to right-click MyButton in the NodeTree and go Convert Nodes to Prefabs.
Upon double-clicking your new prefab, you can now switch between Screen view (where we see our actual scene) and a new MyButton view, where you can see just your prefab by itself).
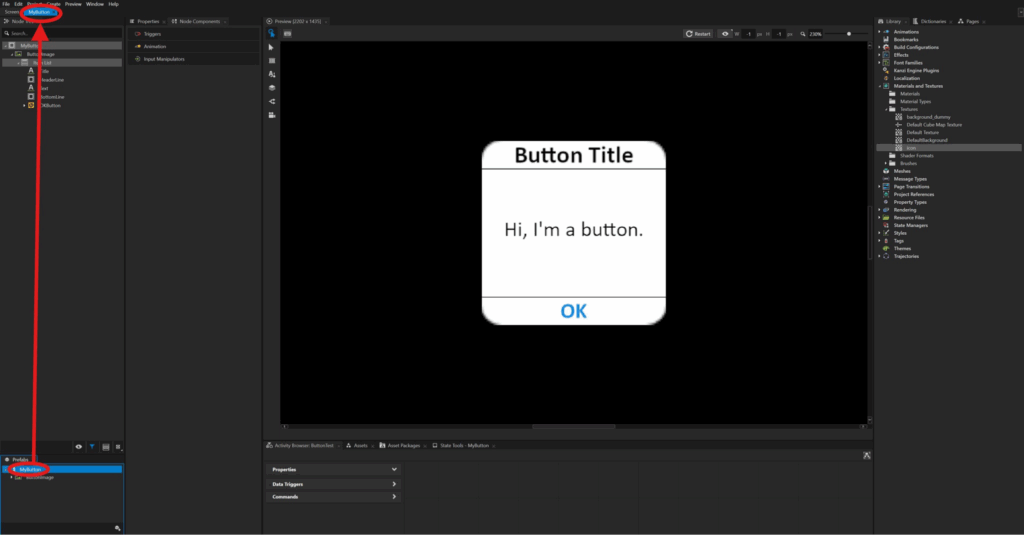
Adding a backdrop
Let’s finish off our button scene by adding a nice backdrop!
Nested inside Root (and above MyButton in the Node Tree), create a new Empty Node 2D called “Backdrop Fill”.
- Foreground Brush: set this to some color you like. I chose blue here!
- Layout Width/Height: make it something large like (3000,3000).
- Horizontal/Vertical Alignment: Center, Center
Next, nested inside BackdropFill, create a new Image called “BackdropImage”.
- Image: set to the image texture.
- Layout Width/Height: set it to the same dimensions as BackdropFill.
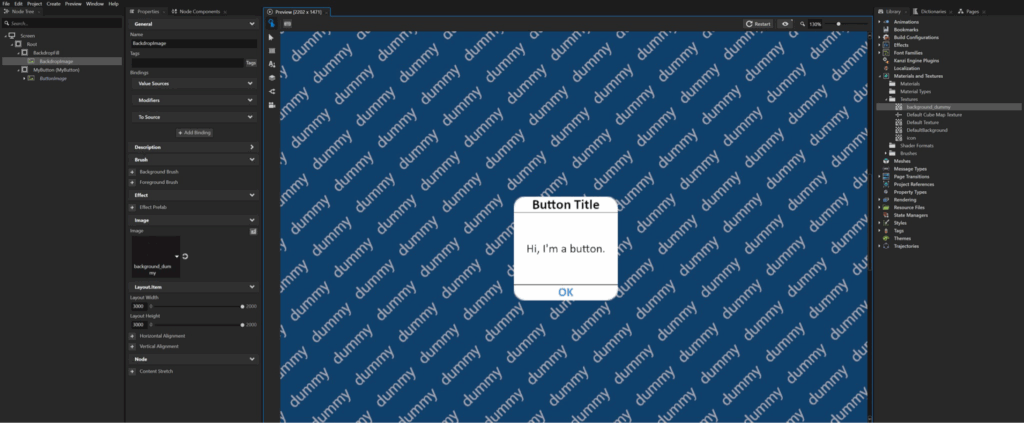
And with that, we’ve successfully created a simple button in Kanzi!
We started by setting up the container and arranging the button image. Then, we added window text, divider lines, and the actual button. We also made the window disappear when the OK button is clicked. Finally, we added a backdrop to make our button screen look nicer!
