Let’s create a simple cinematic animation using Unreal Engine 5! I’ll be using UE 5.4.4 for this project.
In this first part of the Creating a Simple Cinematic series, we’ll cover the early planning stages, character setup, as well as some basic sequencer work!
Planning the animation
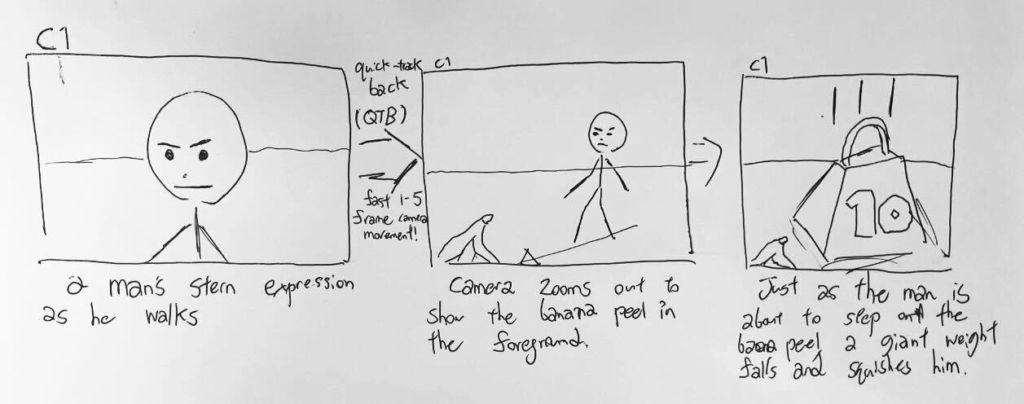
My initial idea for the cinematic was very simple.
- A character is walking sternly down the street – we can see a banana peel along the path.
- Just before the character steps on the banana peel, a giant 100-ton weight falls from the sky and crushes him.
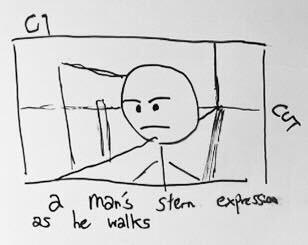
I scrapped my first storyboard pretty quickly, mainly because C1 was in a side view that’s hard to smoothly transition from.
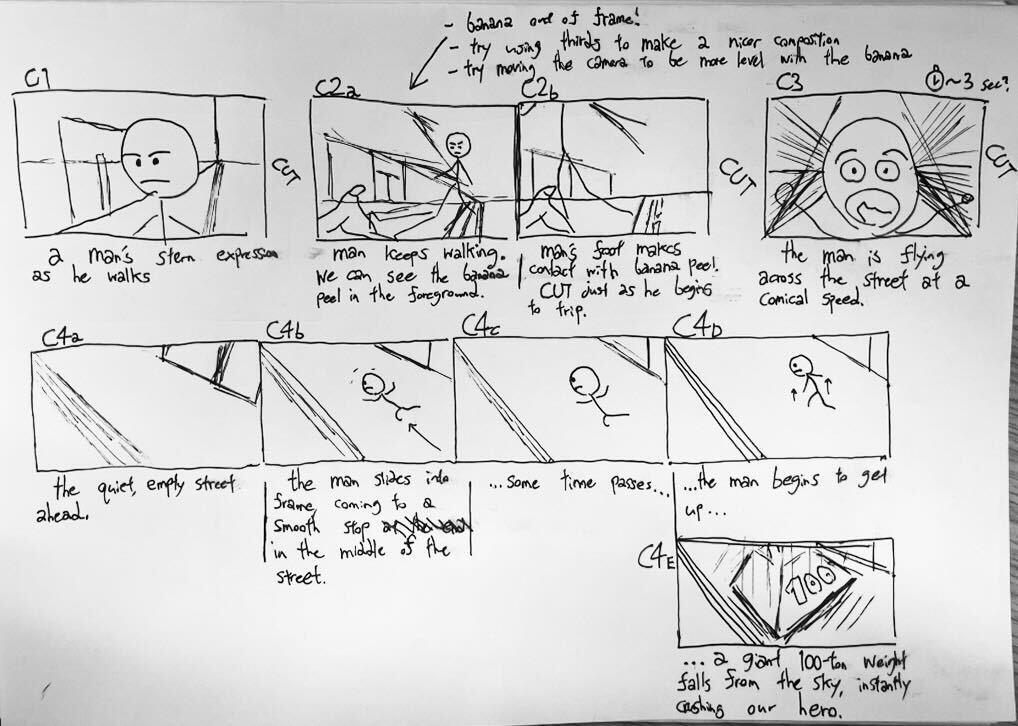
However, I figured this was just a bit too simple, hence I added a bit more to my little story:
- A character is walking sternly down the street – we can see a banana peel along the path.
- The character steps on the banana peel, he trips and flies across the street at comical speeds.
- The character finally comes to a stop. A few moments pass. Just as the character begins to get back on his feet, a giant 10 ton weight falls from the sky and crushes him.
Pretty simple stuff, but this project is a great way to learn how to start making movies in Unreal!

Creating storyboards
According to the experts, you should always write your script before drawing the storyboard – don’t take on both tasks at once!
Moreover, if you’re descriptive in your script, the kind of shot composition you need arises naturally. For example, if my script says that the character has a happy expression on his face, it’s only natural that I would use a medium-closeup shot here.
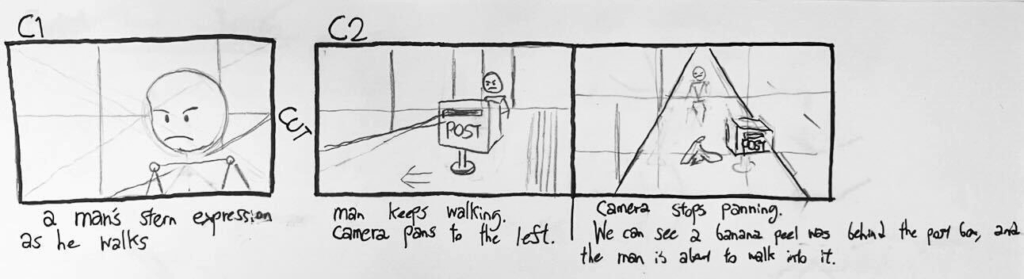
Adding interest
Here’s an alternative composition that hides the banana peel behind a postbox before the camera begins to pan. Although there’s still a lot to be improved here (for example, moving the camera closer to the postbox would probably look a lot more dramatic), it goes to show how a little creativity can add a lot of interest to our simple story!
Preparing the models
the Character Model
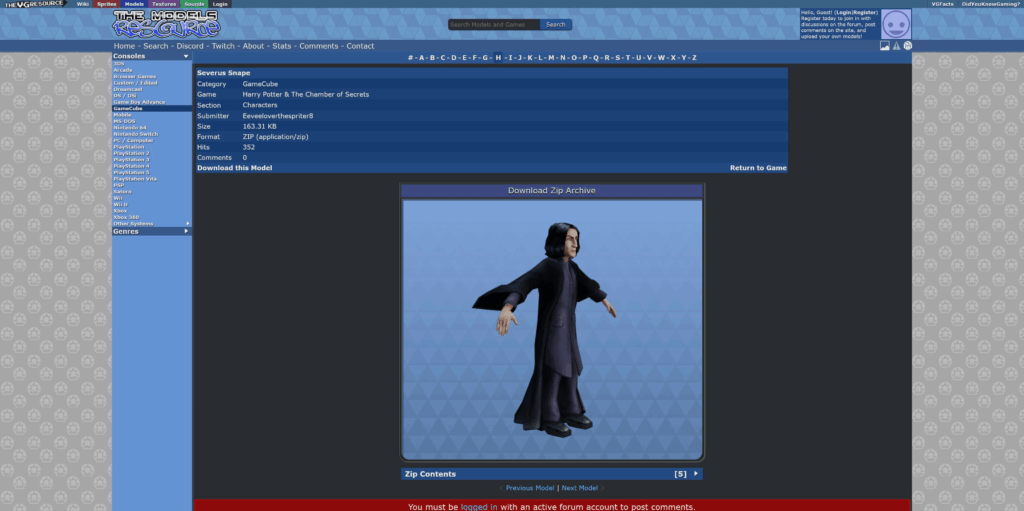
I’ll do some browsing on models-resource.com for some humanoid models that will be appropriate for a walking + tripping animation.
This model of Serverus Snape from the GameCube version of Harry Potter & The Chamber of Secrets look like it’ll do the job!
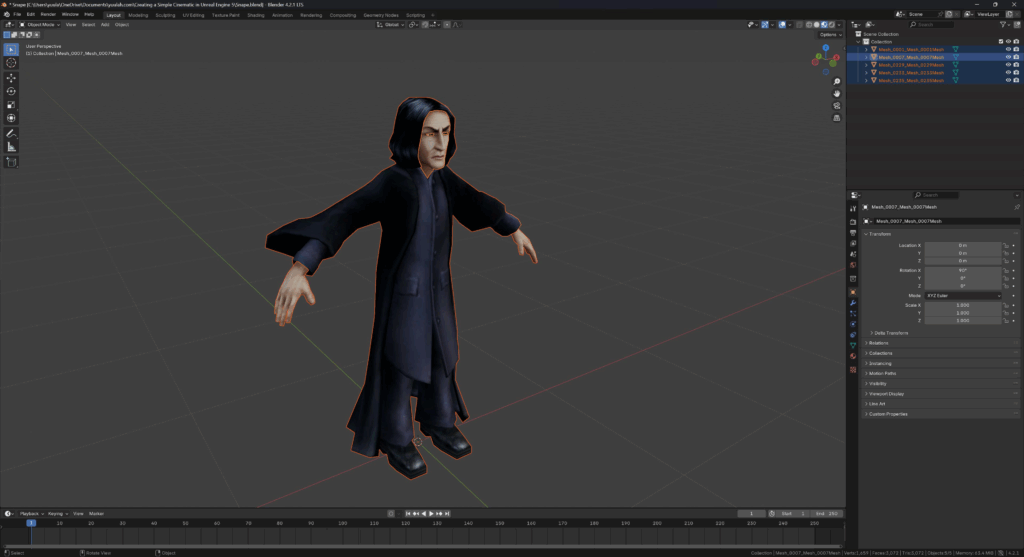
Importing the downloaded OBJ into Blender, the model’s looking really nice!
Since the meshes are split into separate parts, however (body, head, hands etc.), I’ll join them into one object to make our animation-life a bit easier.
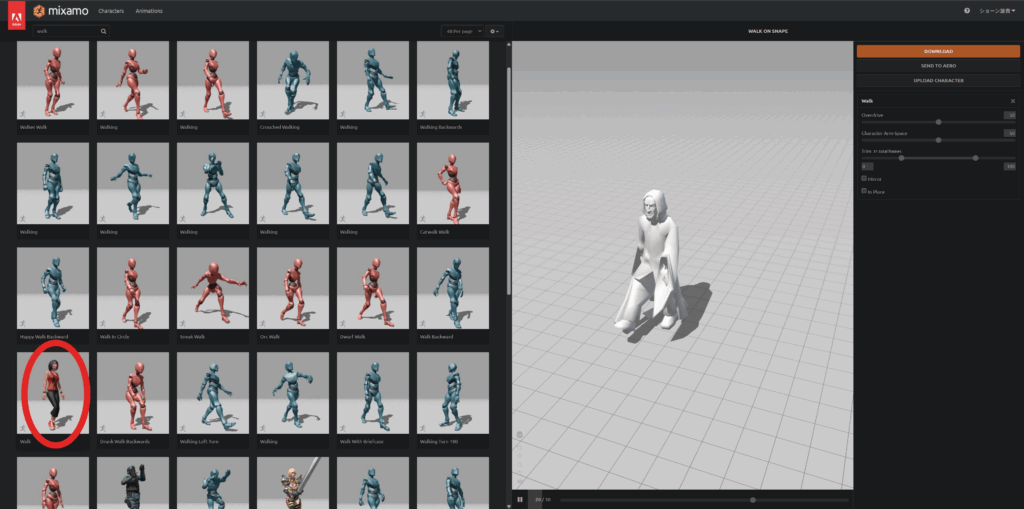
Downloading character animations from Mixamo
Next, let’s set up some animations for walking and tripping! We’ll use Mixamo for this.
Export Professor Snape as an FBX, and then import it into Mixamo.
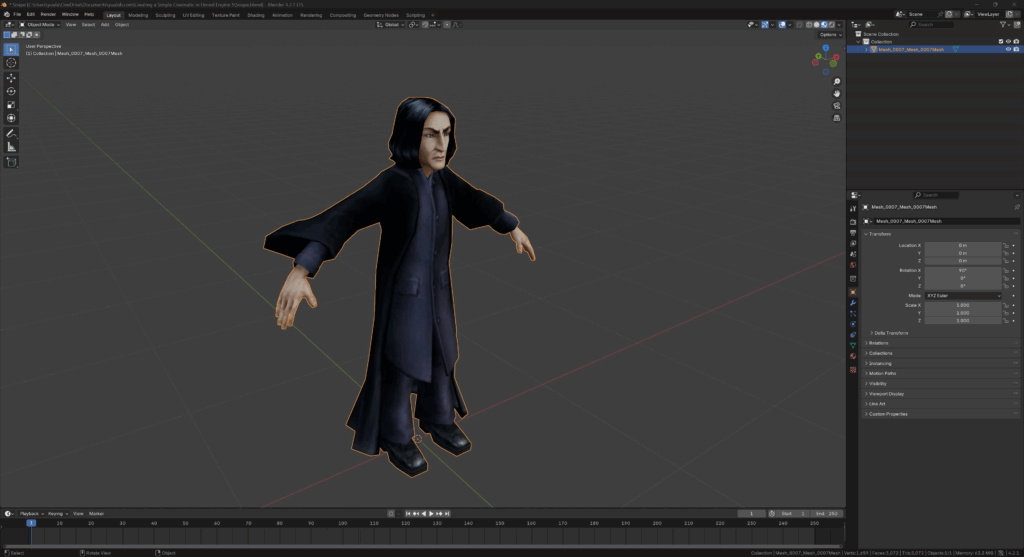
For some reason the texture of this model isn’t showing up correctly, but don’t worry – it’ll look correct once we import back into Blender!
I’ll pick out and download two animations – one for walking, and one for tripping. (download them as two separate FBX files!)

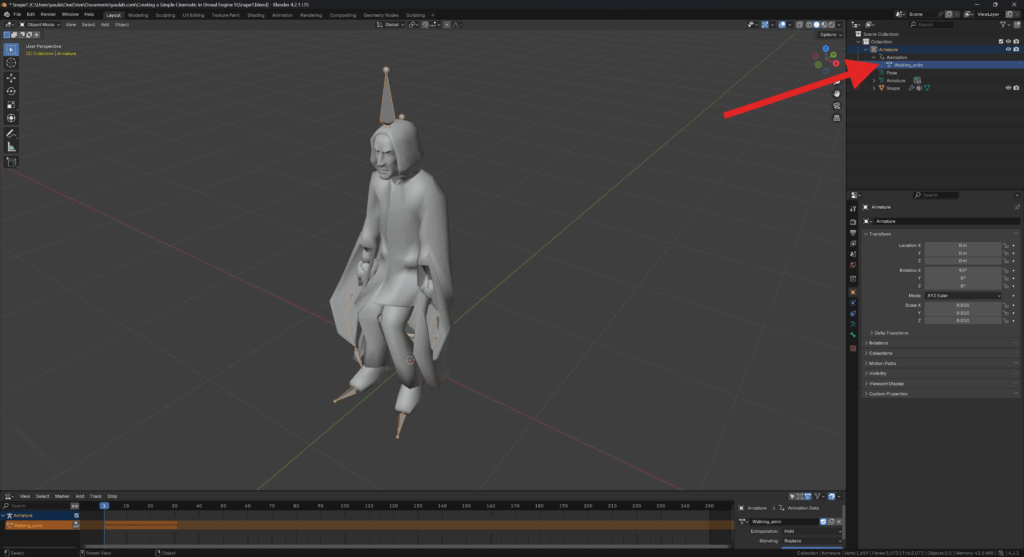
Importing the animations in Blender
Create a new, empty Blender file.
Import the first animation FBX (walking).
- inside the Outliner, underneath Armature / Animation, rename the animation to “Walking_anim”.
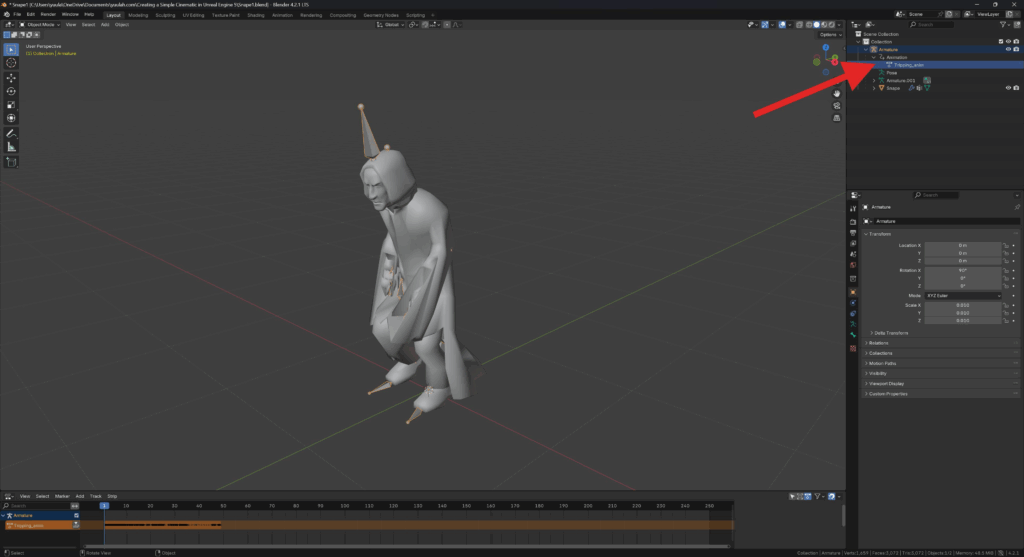
Delete everything in the scene such that it’s empty.
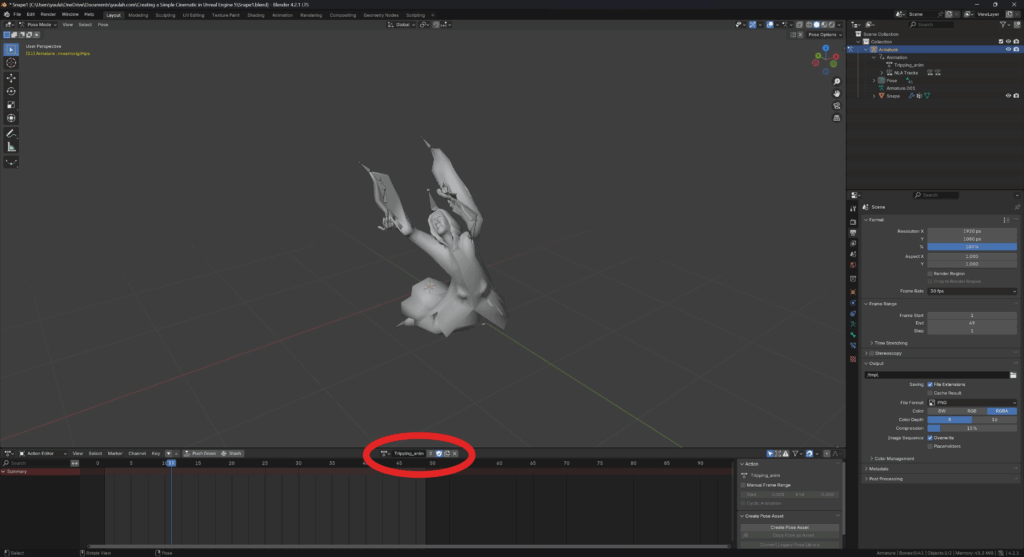
Import the second animation FBX and rename this animation to “Tripping_anim”.
Next, open up the Non-Linear Animation (NLA) tab.
In the Tripping_anim track, hit the Push Down Action button.
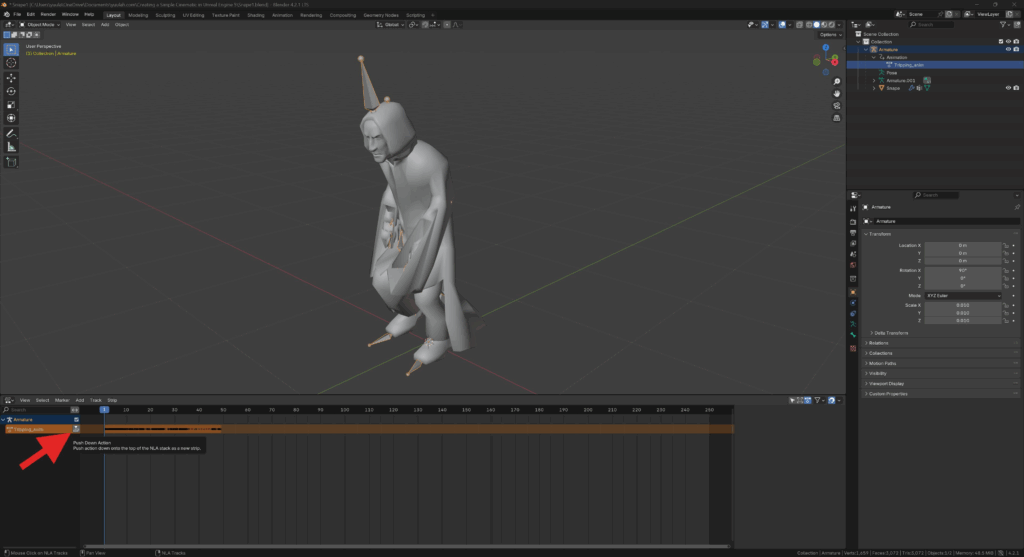
Go Add / Action and add the Walking_anim.
Rename the newly created track to “Walking_anim”.

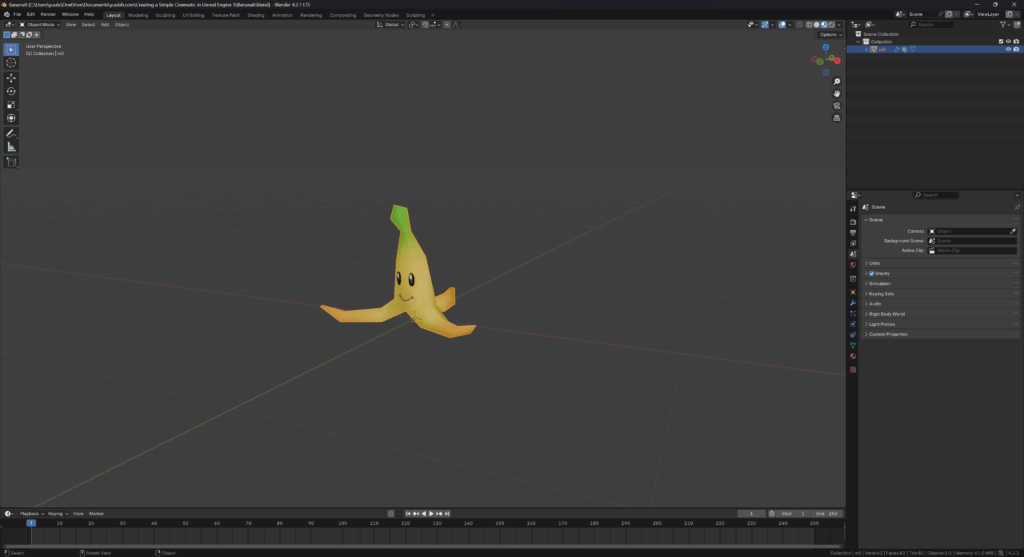
the Banana Peel
The next model we’ll need for our animation is a banana peel. Luckily, turns out there are tons of bananas being used in video games!
I’ll use the banana peel from Mario Kart: Double Dash for this animation.

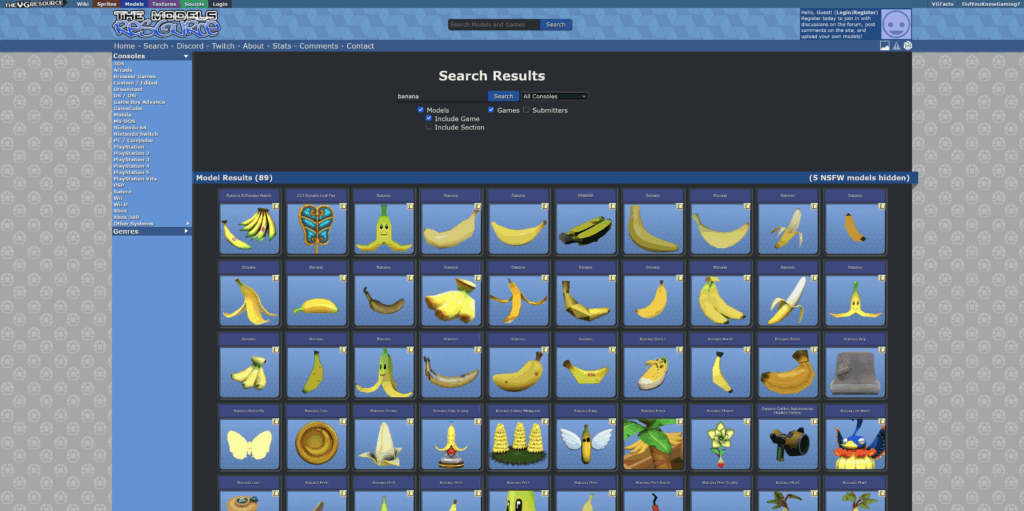
Just as we did with Snape, I’ll download this model and import it into Blender.
The other models
We’ll want to prepare some other models too (the weight, maybe some environment meshes to make a street…), but so long as we know the method, this is no issue at all!

Set up the UE5 project
Now, let’s set up the UE5 project!
From the Film / Video & Live Events tab, I’ll create a new Blank project.
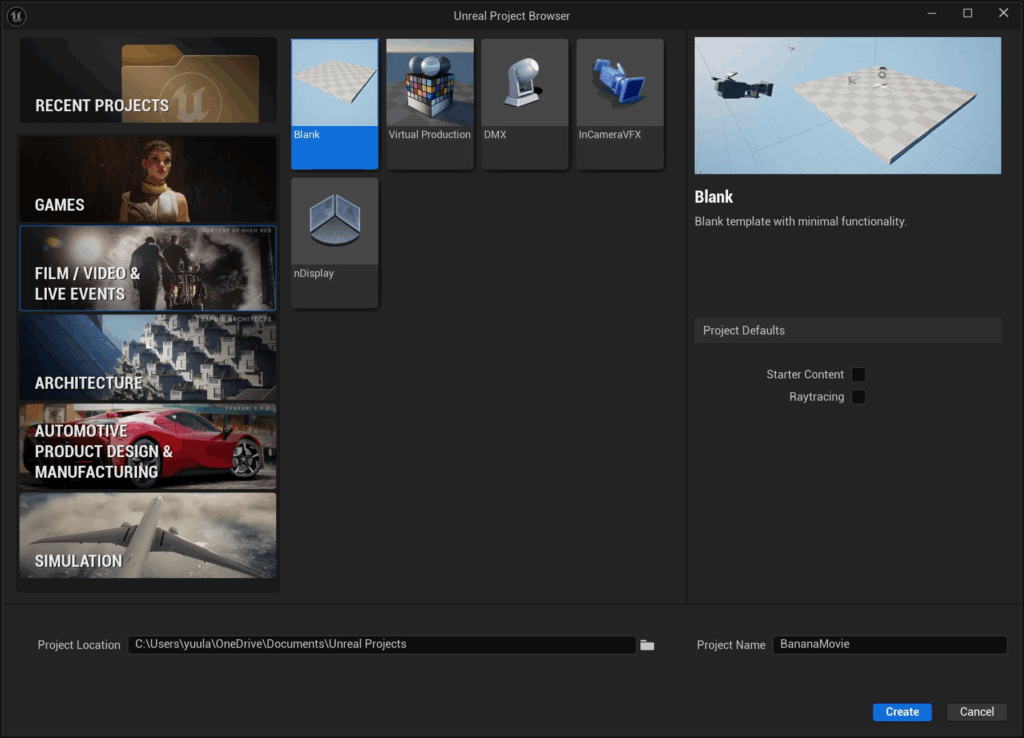
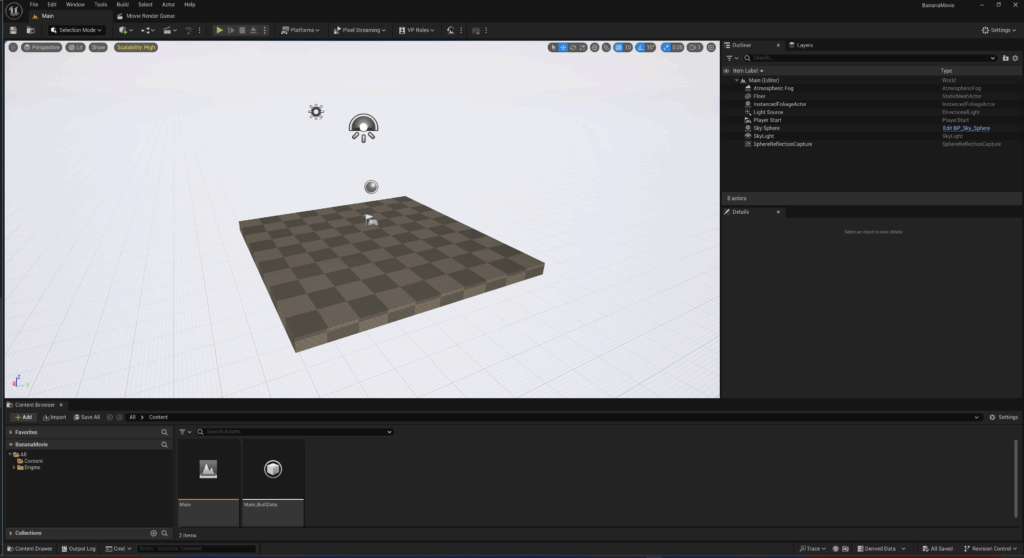
This is all we need for now!
Export the models from Blender
Exporting Snape
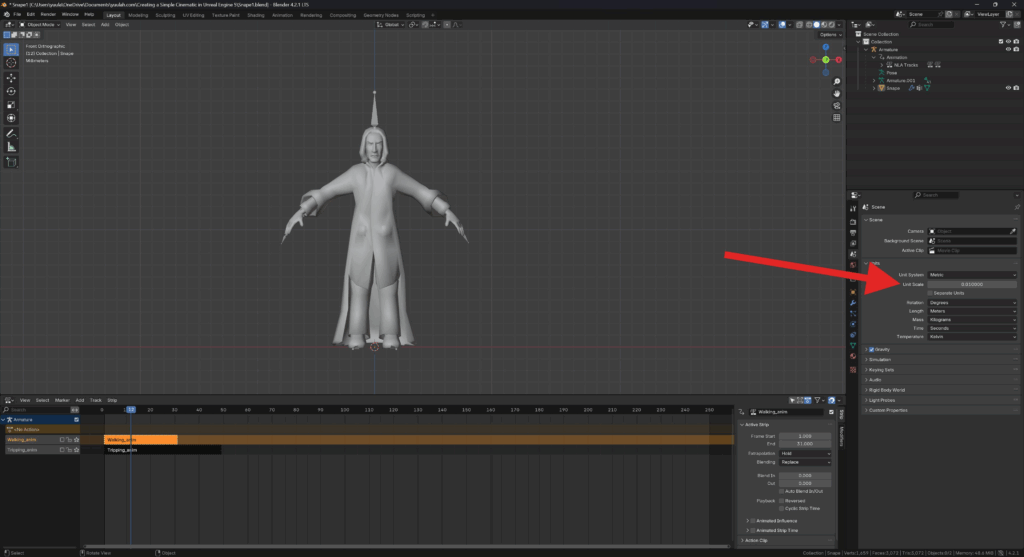
By default, Blender has scene measurements in metres whilst UE5 makes measurements in centimetres.
To prepare for export, set the Units / Unit Scale of your scene to 0.01. Professor Snape is now a little under 2 centimetres tall.
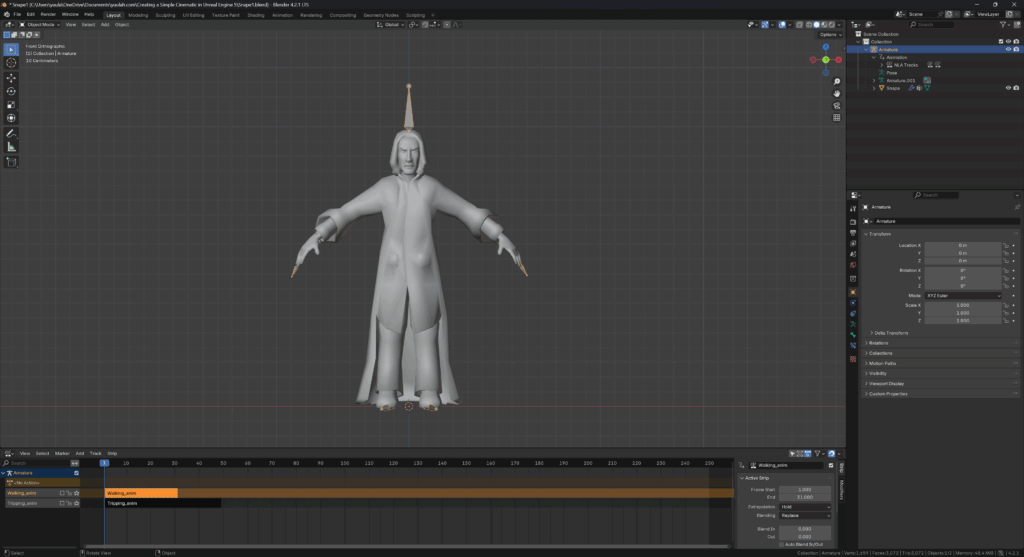
To get Snape back to his usual height whilst preserving our weight-painted character, simply:
- create a new empty.
- parent the Snape armature to the new empty.
- scale the empty up by 100. Then select everything and apply the scale.
- delete the empty! Snape is now a little under 2 metres tall, which seems correct!
In order to get our animated character inside UE, we’ll:
- first export the character + the rig
- then export the animations afterwards
Select Snape’s mesh, and then shift-select his armature.
Export your selection as an FBX:
- enable selected only
- geometry / smoothing: set to face
- uncheck armature / add leaf bones
- uncheck animation
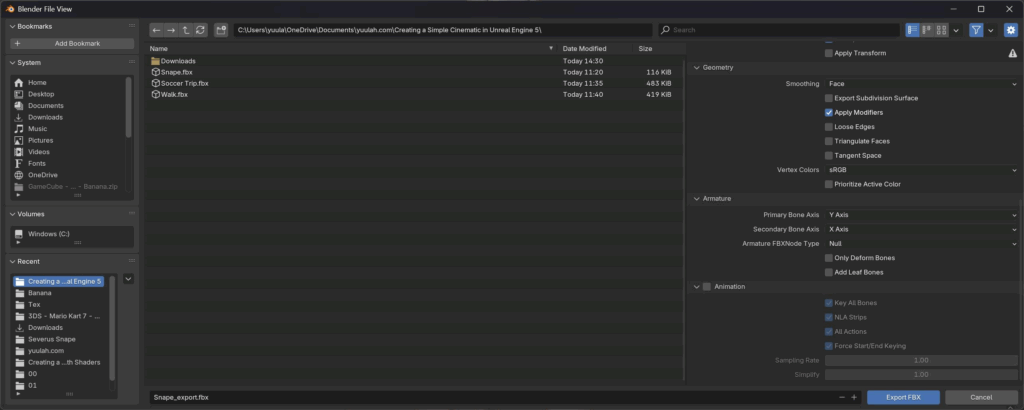
Now to export our animations.
Open up a dope sheet and set it to action editor mode.
Inside the action editor, select Walking_anim.
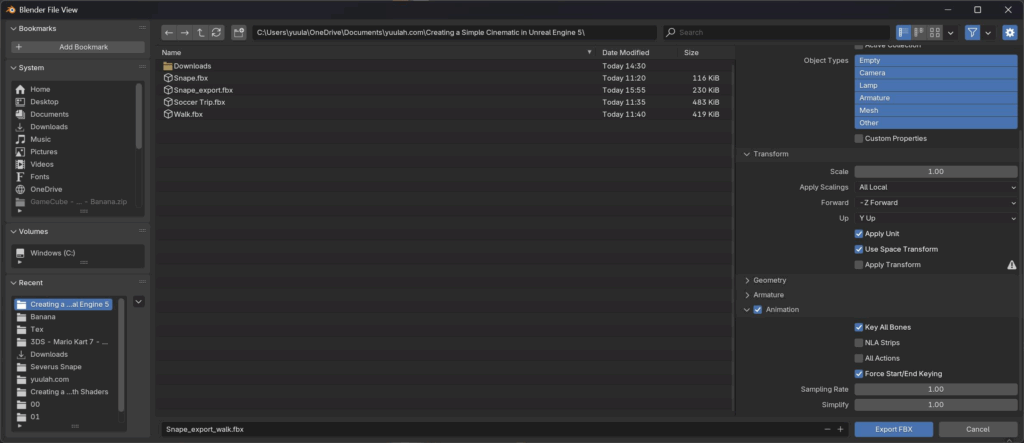
Once again with the mesh and armature selected, export as FBX.
- enable selected only
- geometry / smoothing: set to face
- uncheck armature / add leaf bones
- check animation
- uncheck NLA strips
- uncheck all actions
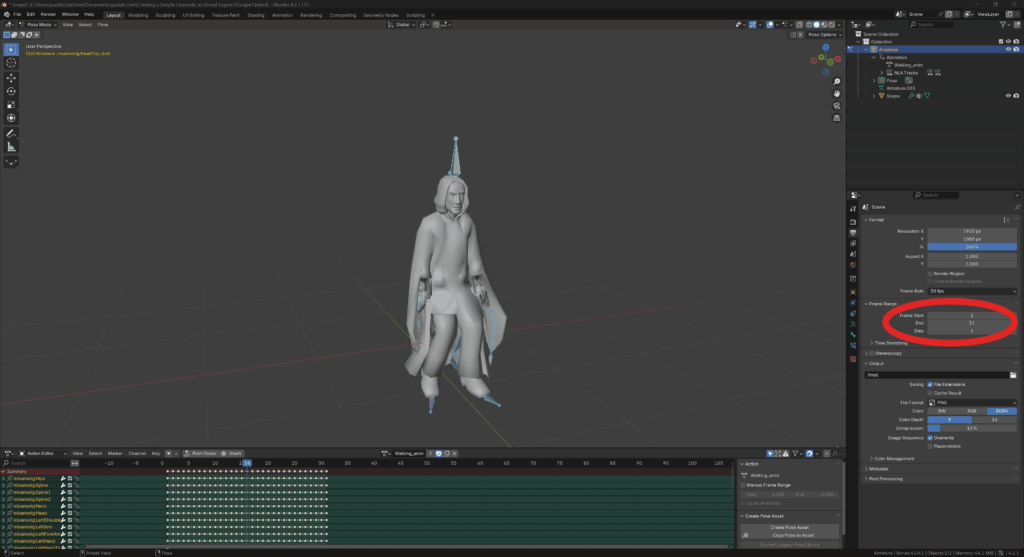
Correct animation length
To ensure that the length of the exported animation is correct, set the frame start and end values in your scene to correspond with the animation you want to export.
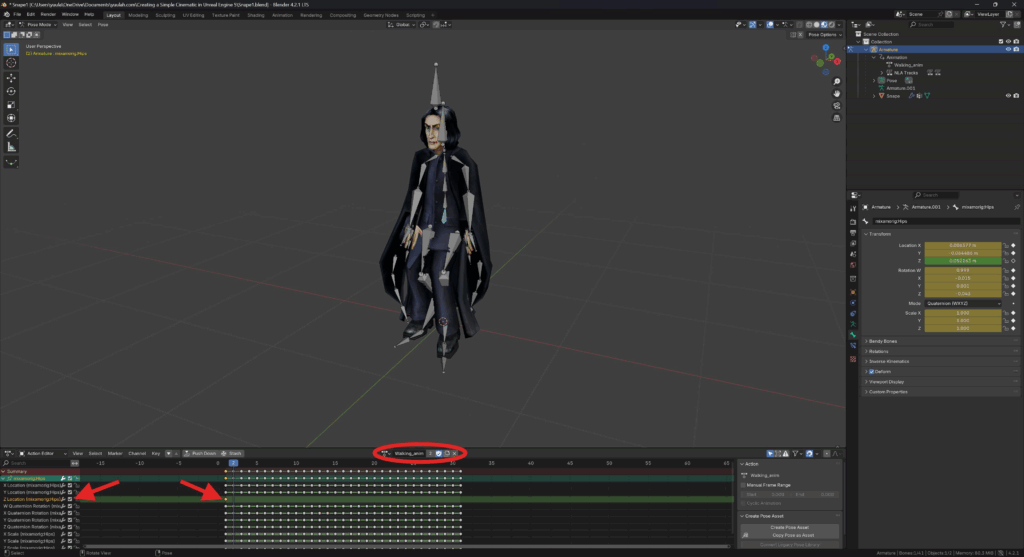
Walk in place
Currently, our animation is such that Snape is actually moving forwards as he walks. We don’t want this, since it makes it really difficult to loop our animation smoothly!
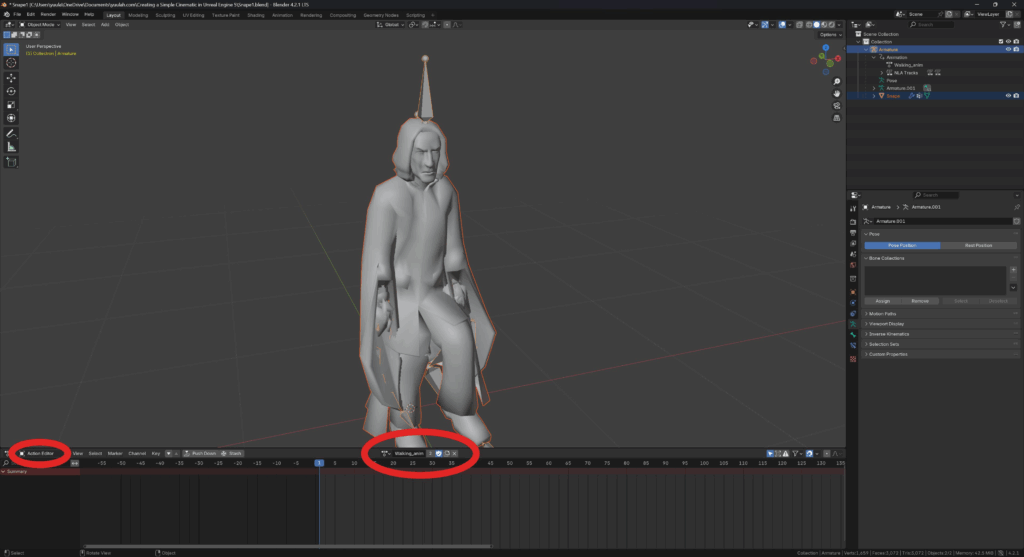
To fix this, begin by finding the root bone of the model (in this case, it was the bone at the bottom of the spine).
Next, with the root bone selected, open up all the channels of Walking_anim inside the Action Editor.
Find the channel that corresponds to moving forwards – in this case, it was the Z location channel.
In that channel, delete all the keyframes except the first one. Snape now walks in place!
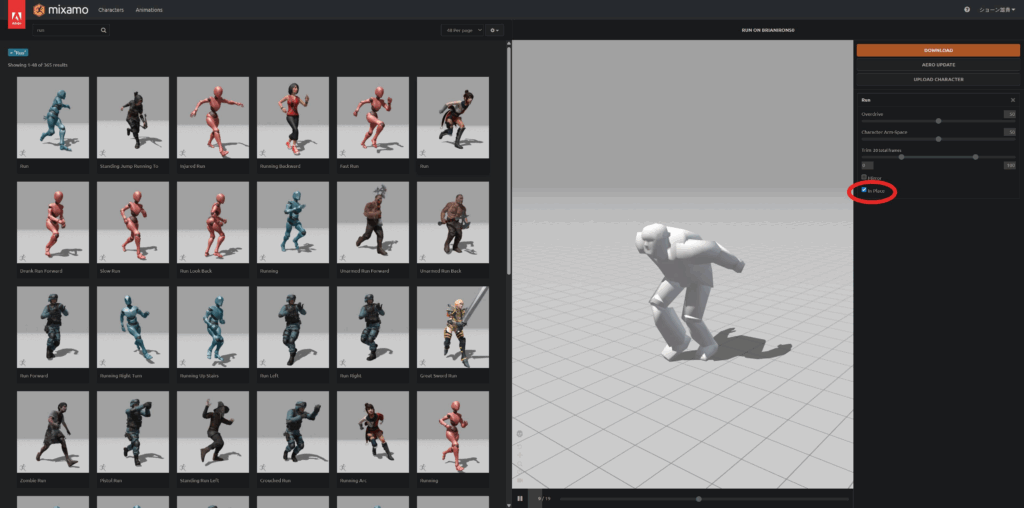
Now, I didn’t realise it here, but Mixamo actually has a walk in place option that you can enable for walking and running animations. So we can use this to make our lives a bit easier!
Now repeat the process to export another FBX for the tripping animation!
Importing Snape in UE
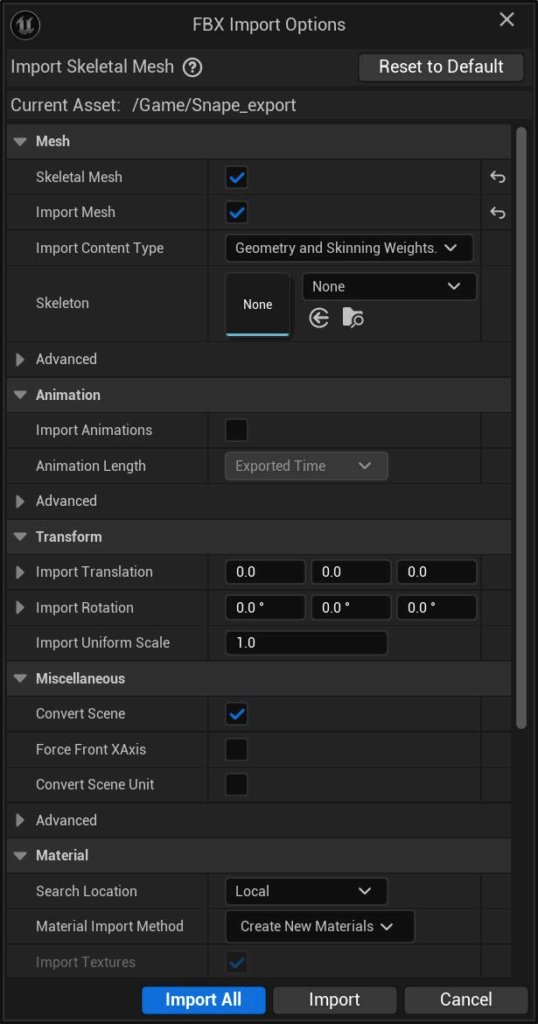
Now inside UE, from the content browser, import the FBX with only the mesh and armature.
- uncheck import animations
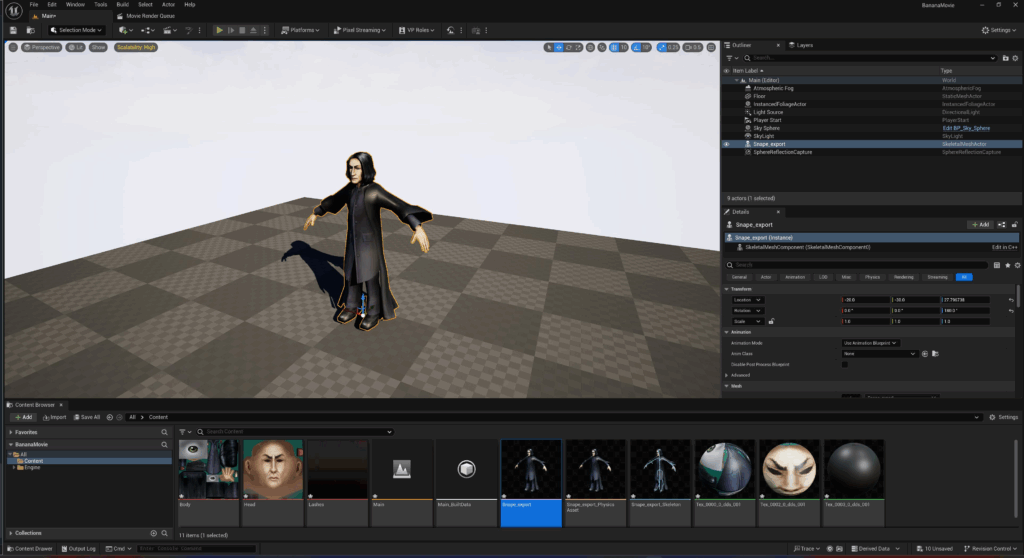
With Snape imported, drag him into your scene!
Snap to ground
To snap an actor to the ground in your scene, simply hit the end key whilst translating.
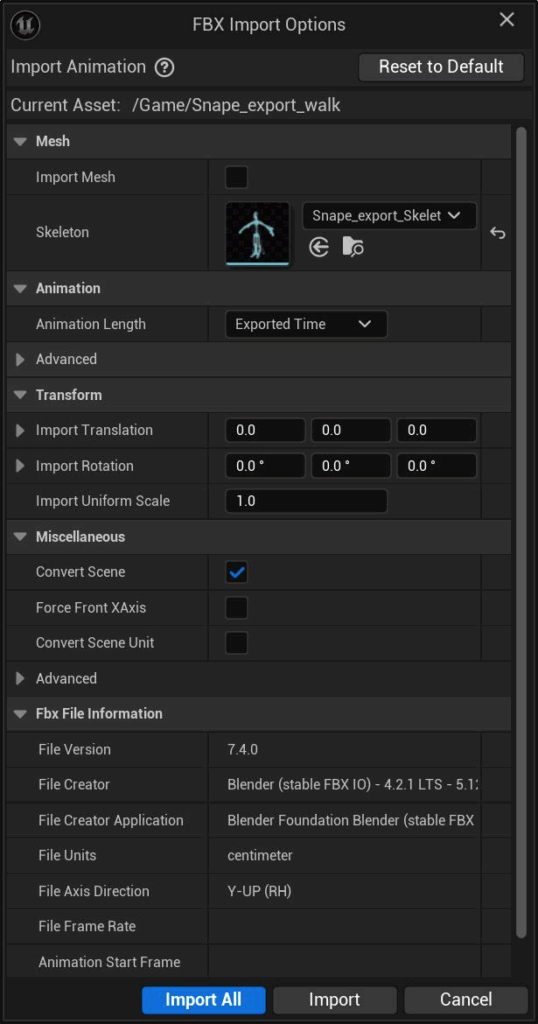
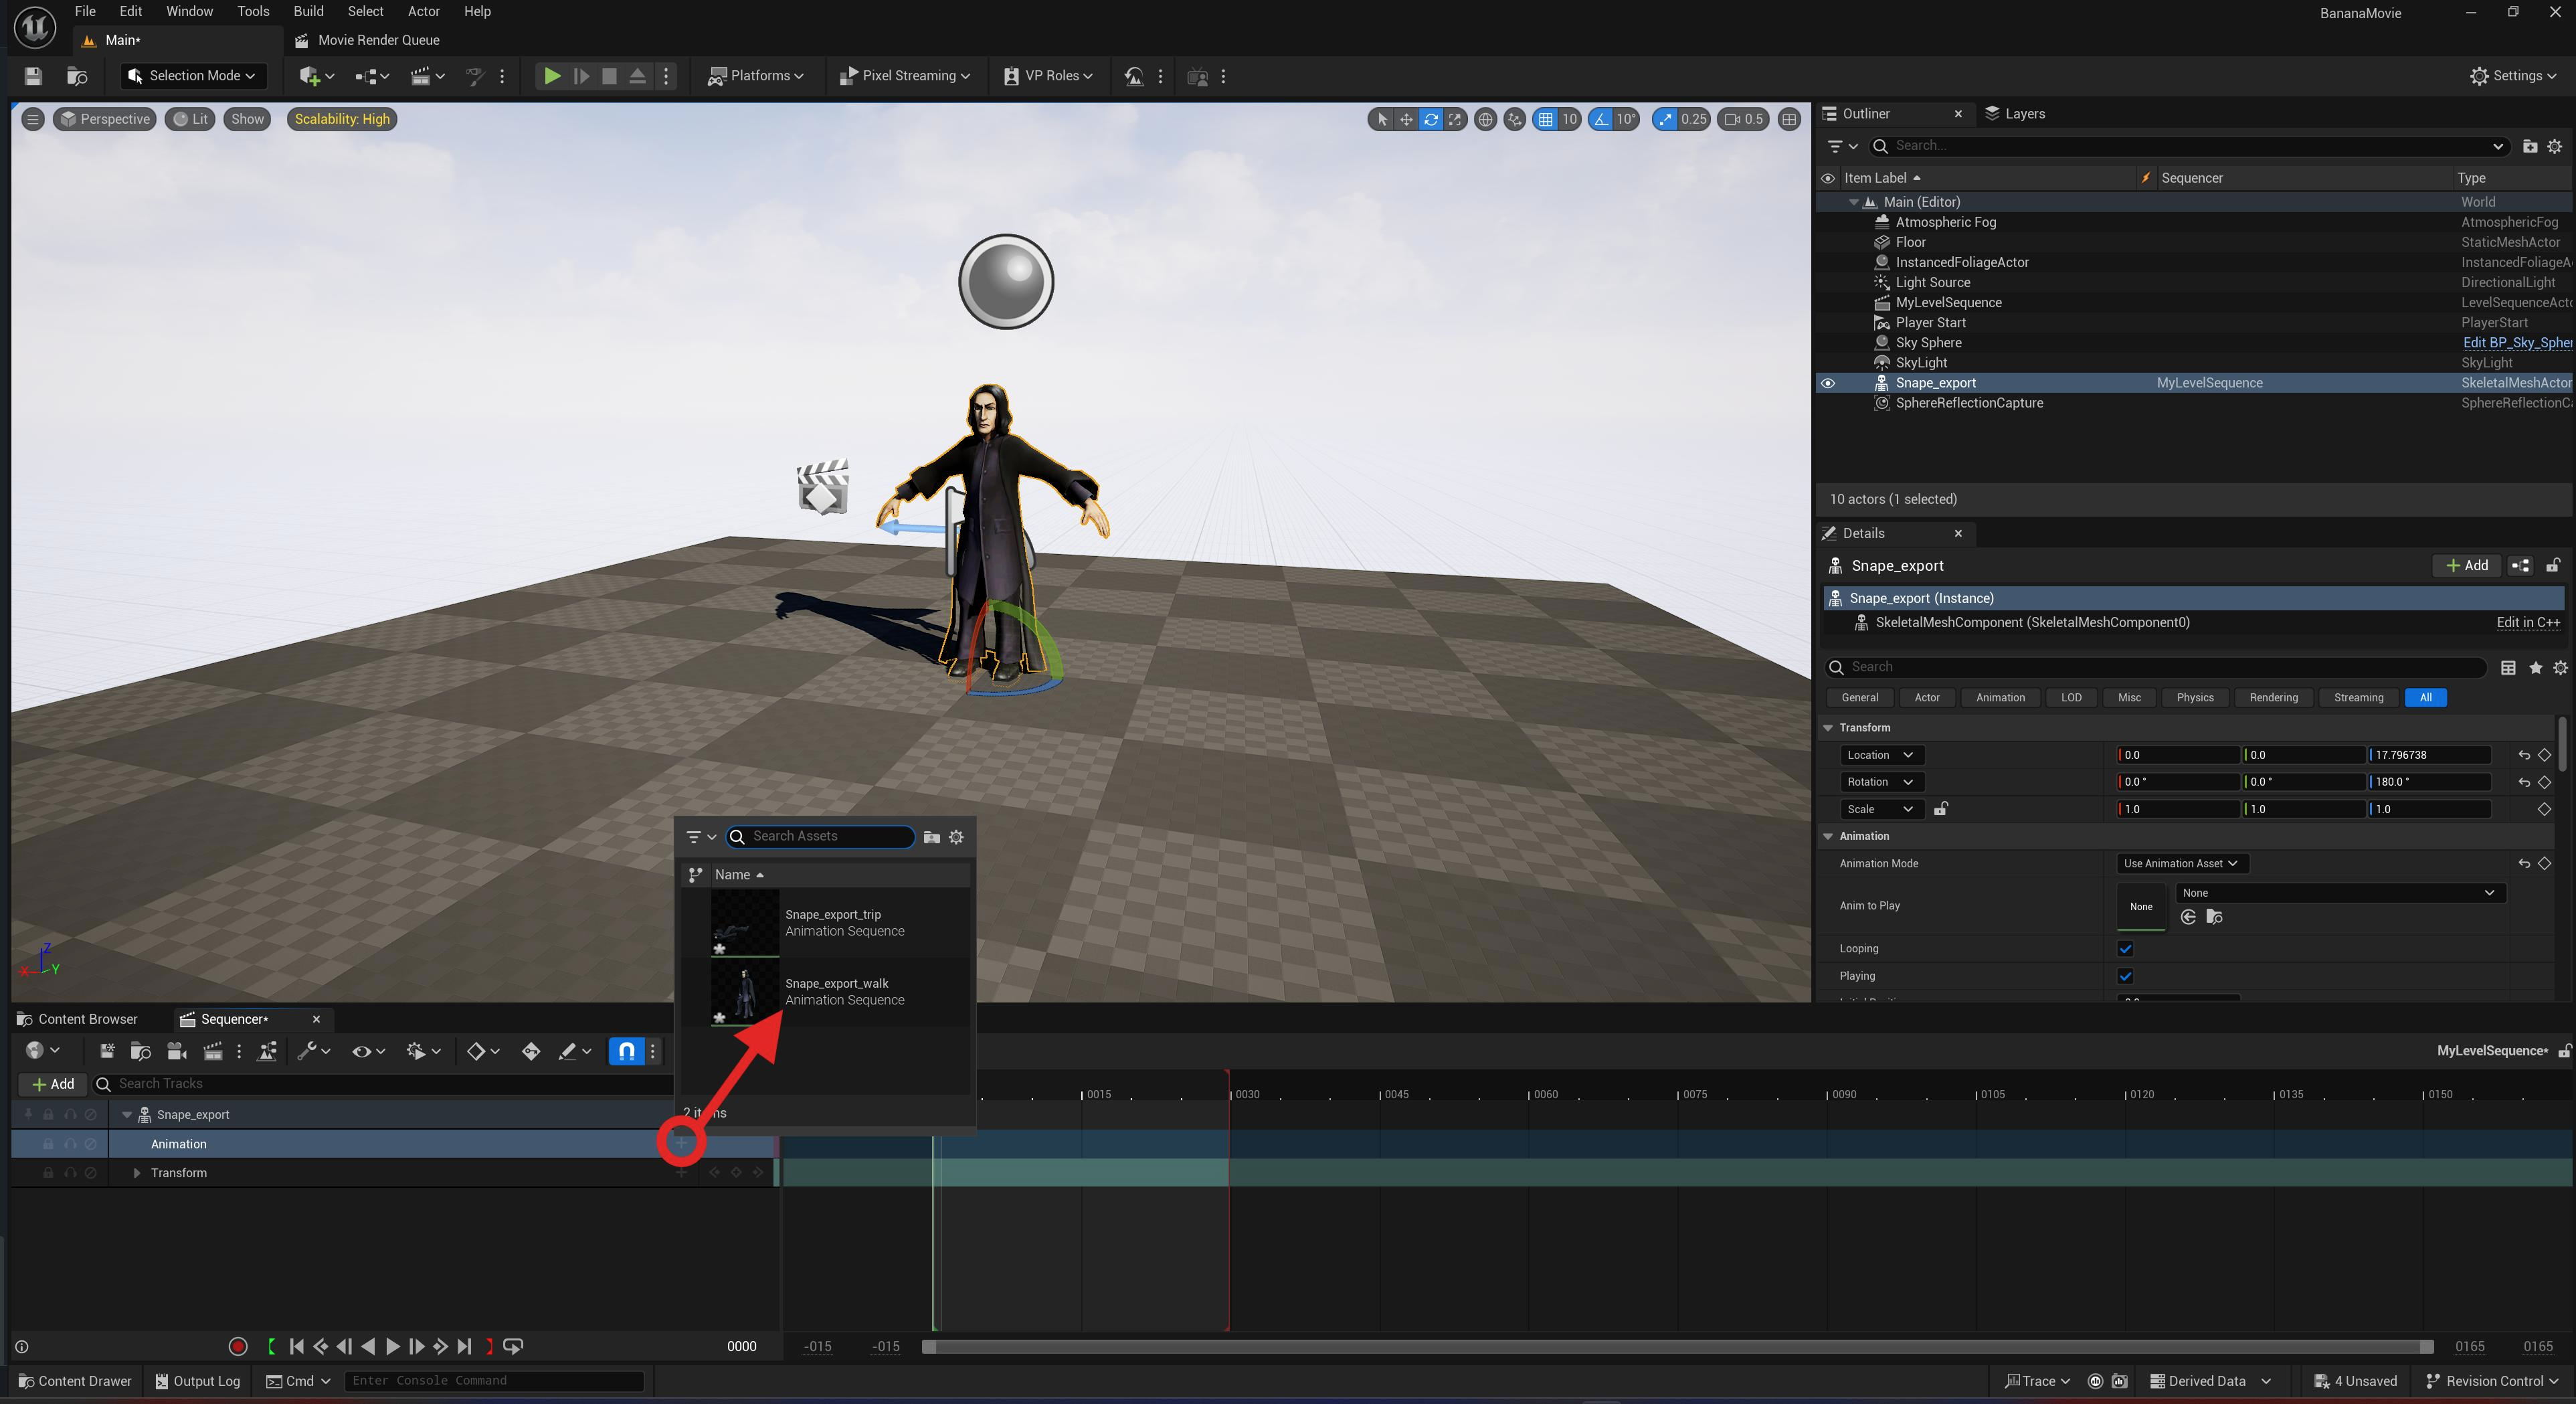
Next, let’s import our walk animation FBX.
- specify the skeleton to be the skeleton we just imported (for me, it’s
Snape_export_Skeleton) - uncheck import mesh
Now repeat to import the tripping animation FBX!
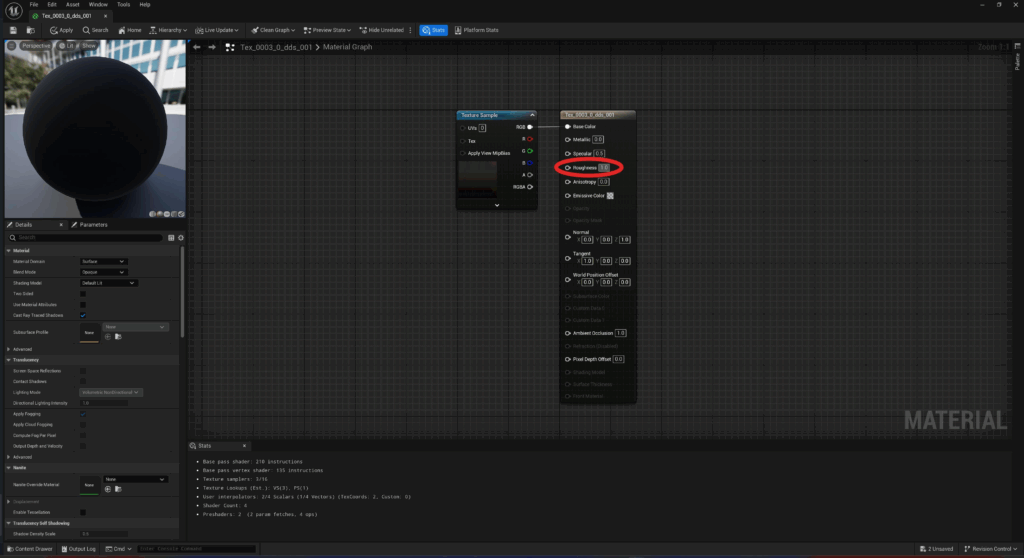
Fixing the shininess
Snape is looking very shiny as the moment – we can fix this by opening up the material assigned to him and setting the Roughness values to ~1.0.
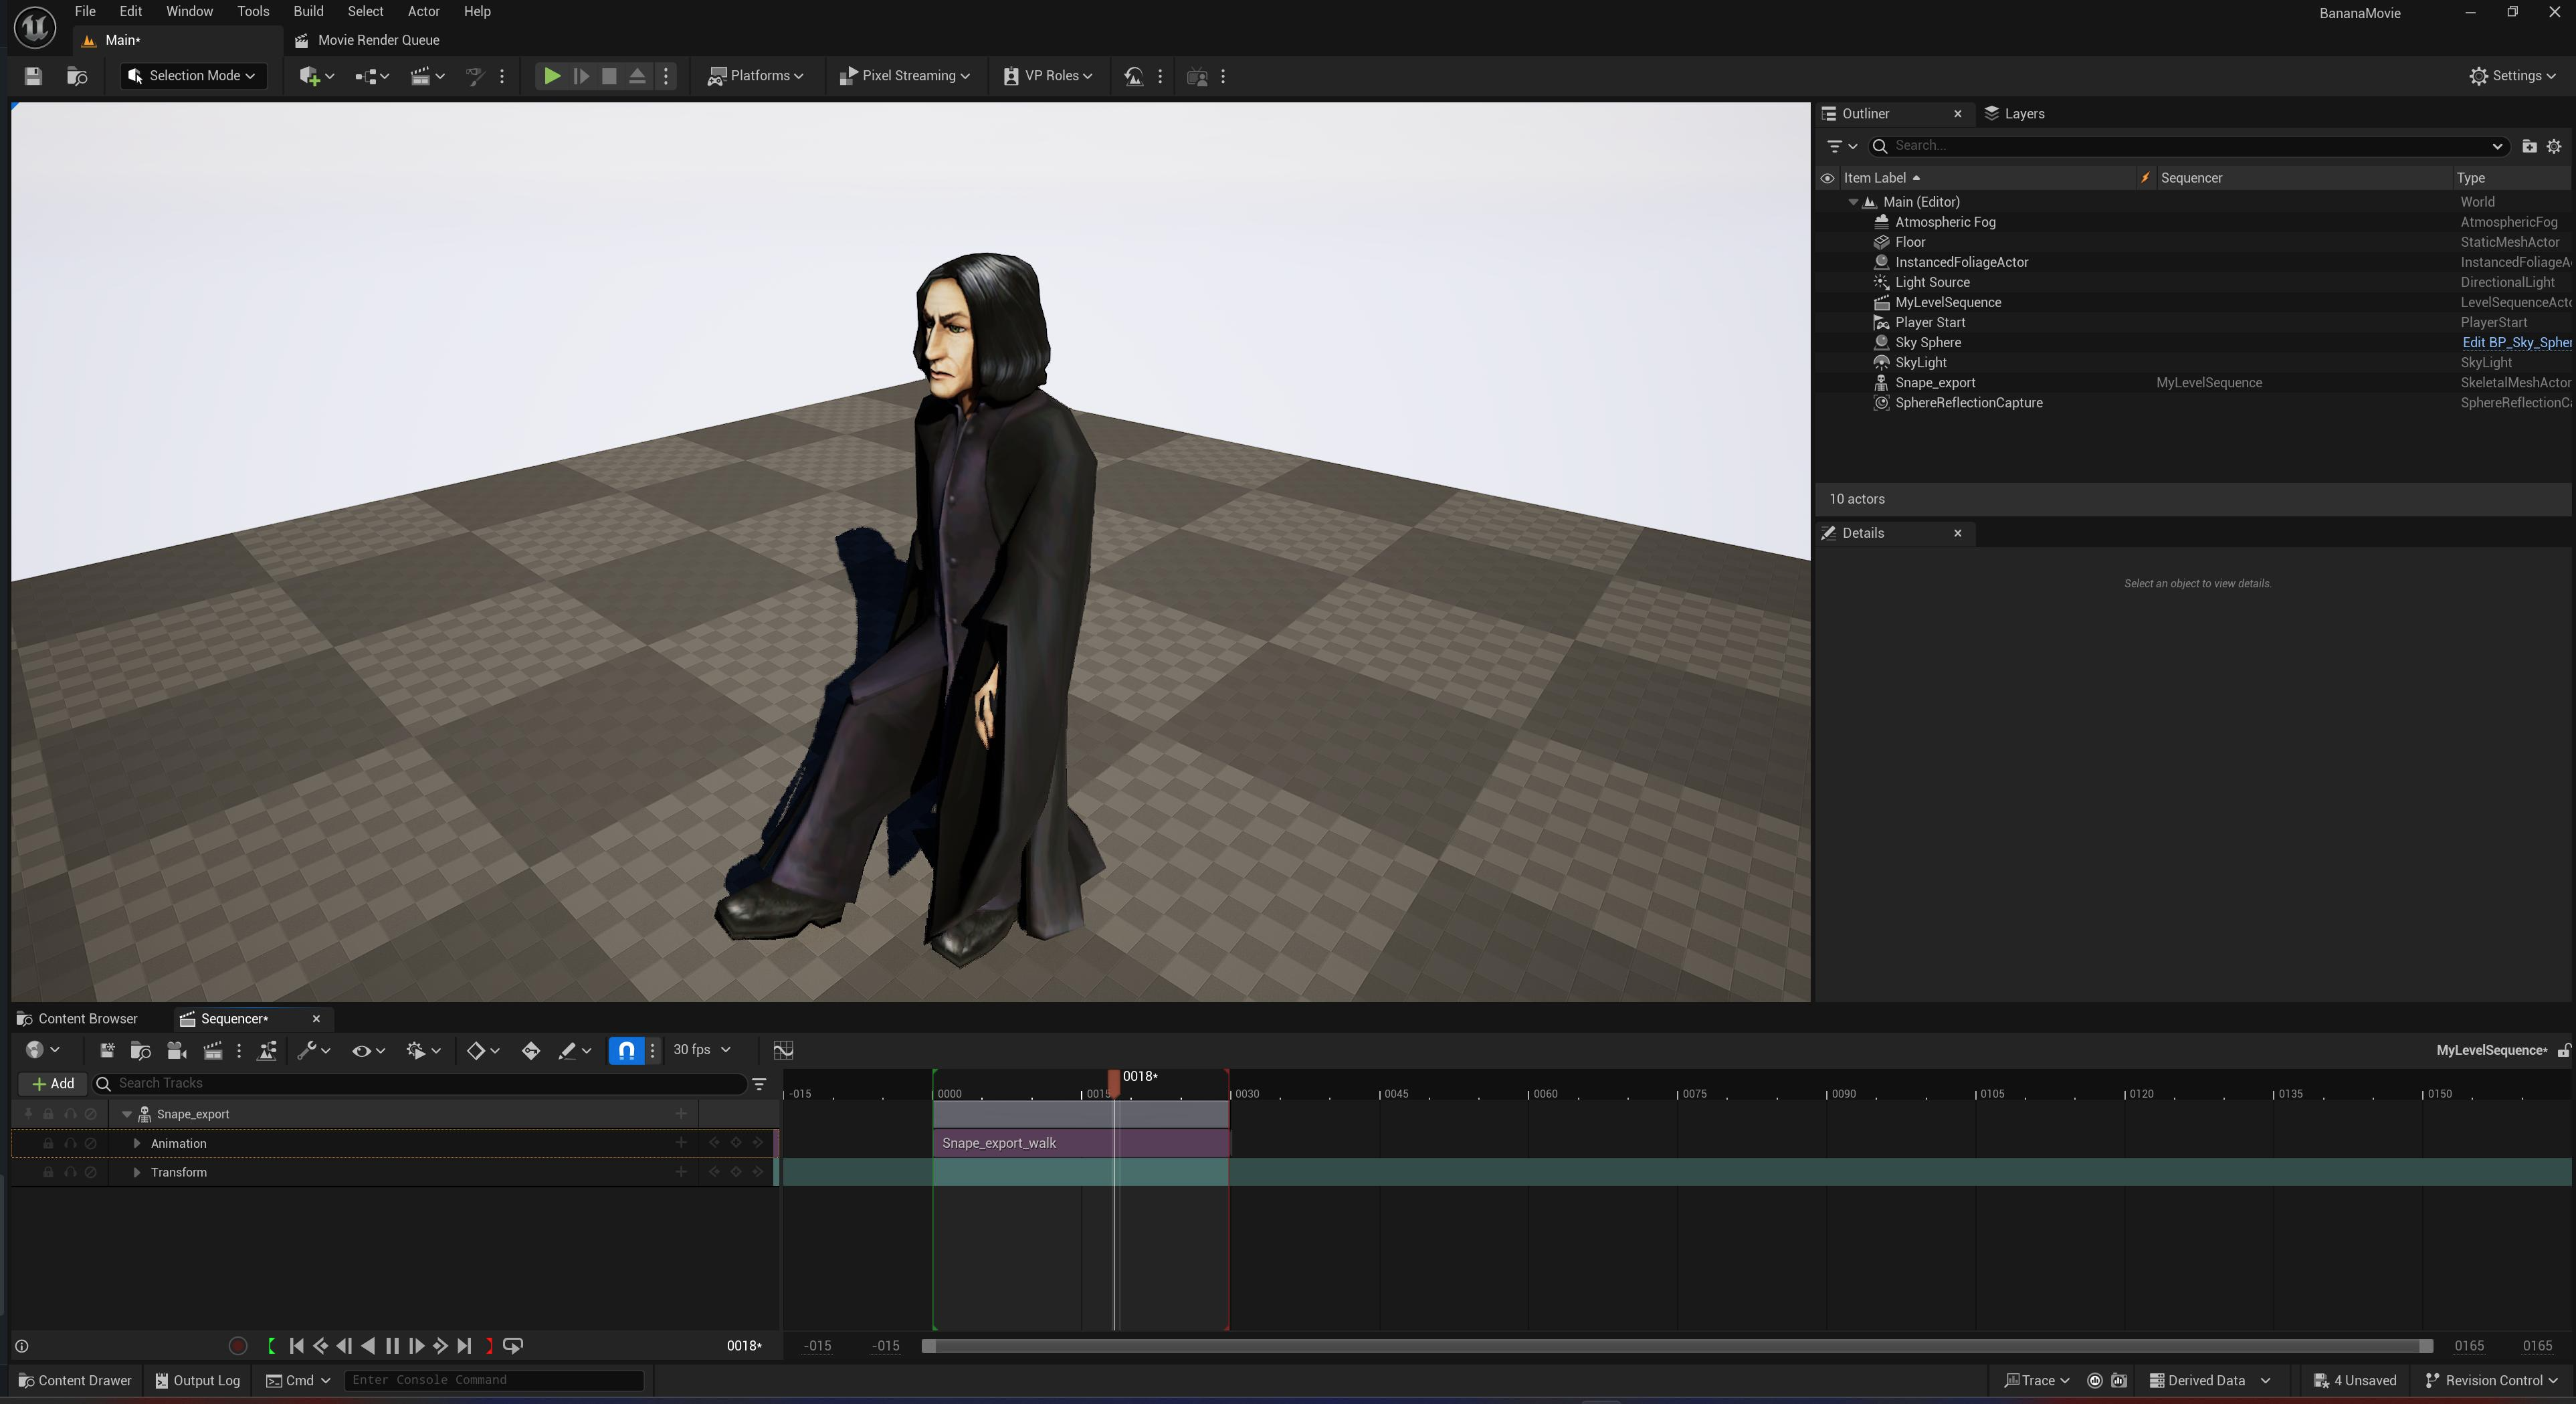
Creating a level sequence
With Snape and his animations in place, it’s time to start creating our actual cinematic!
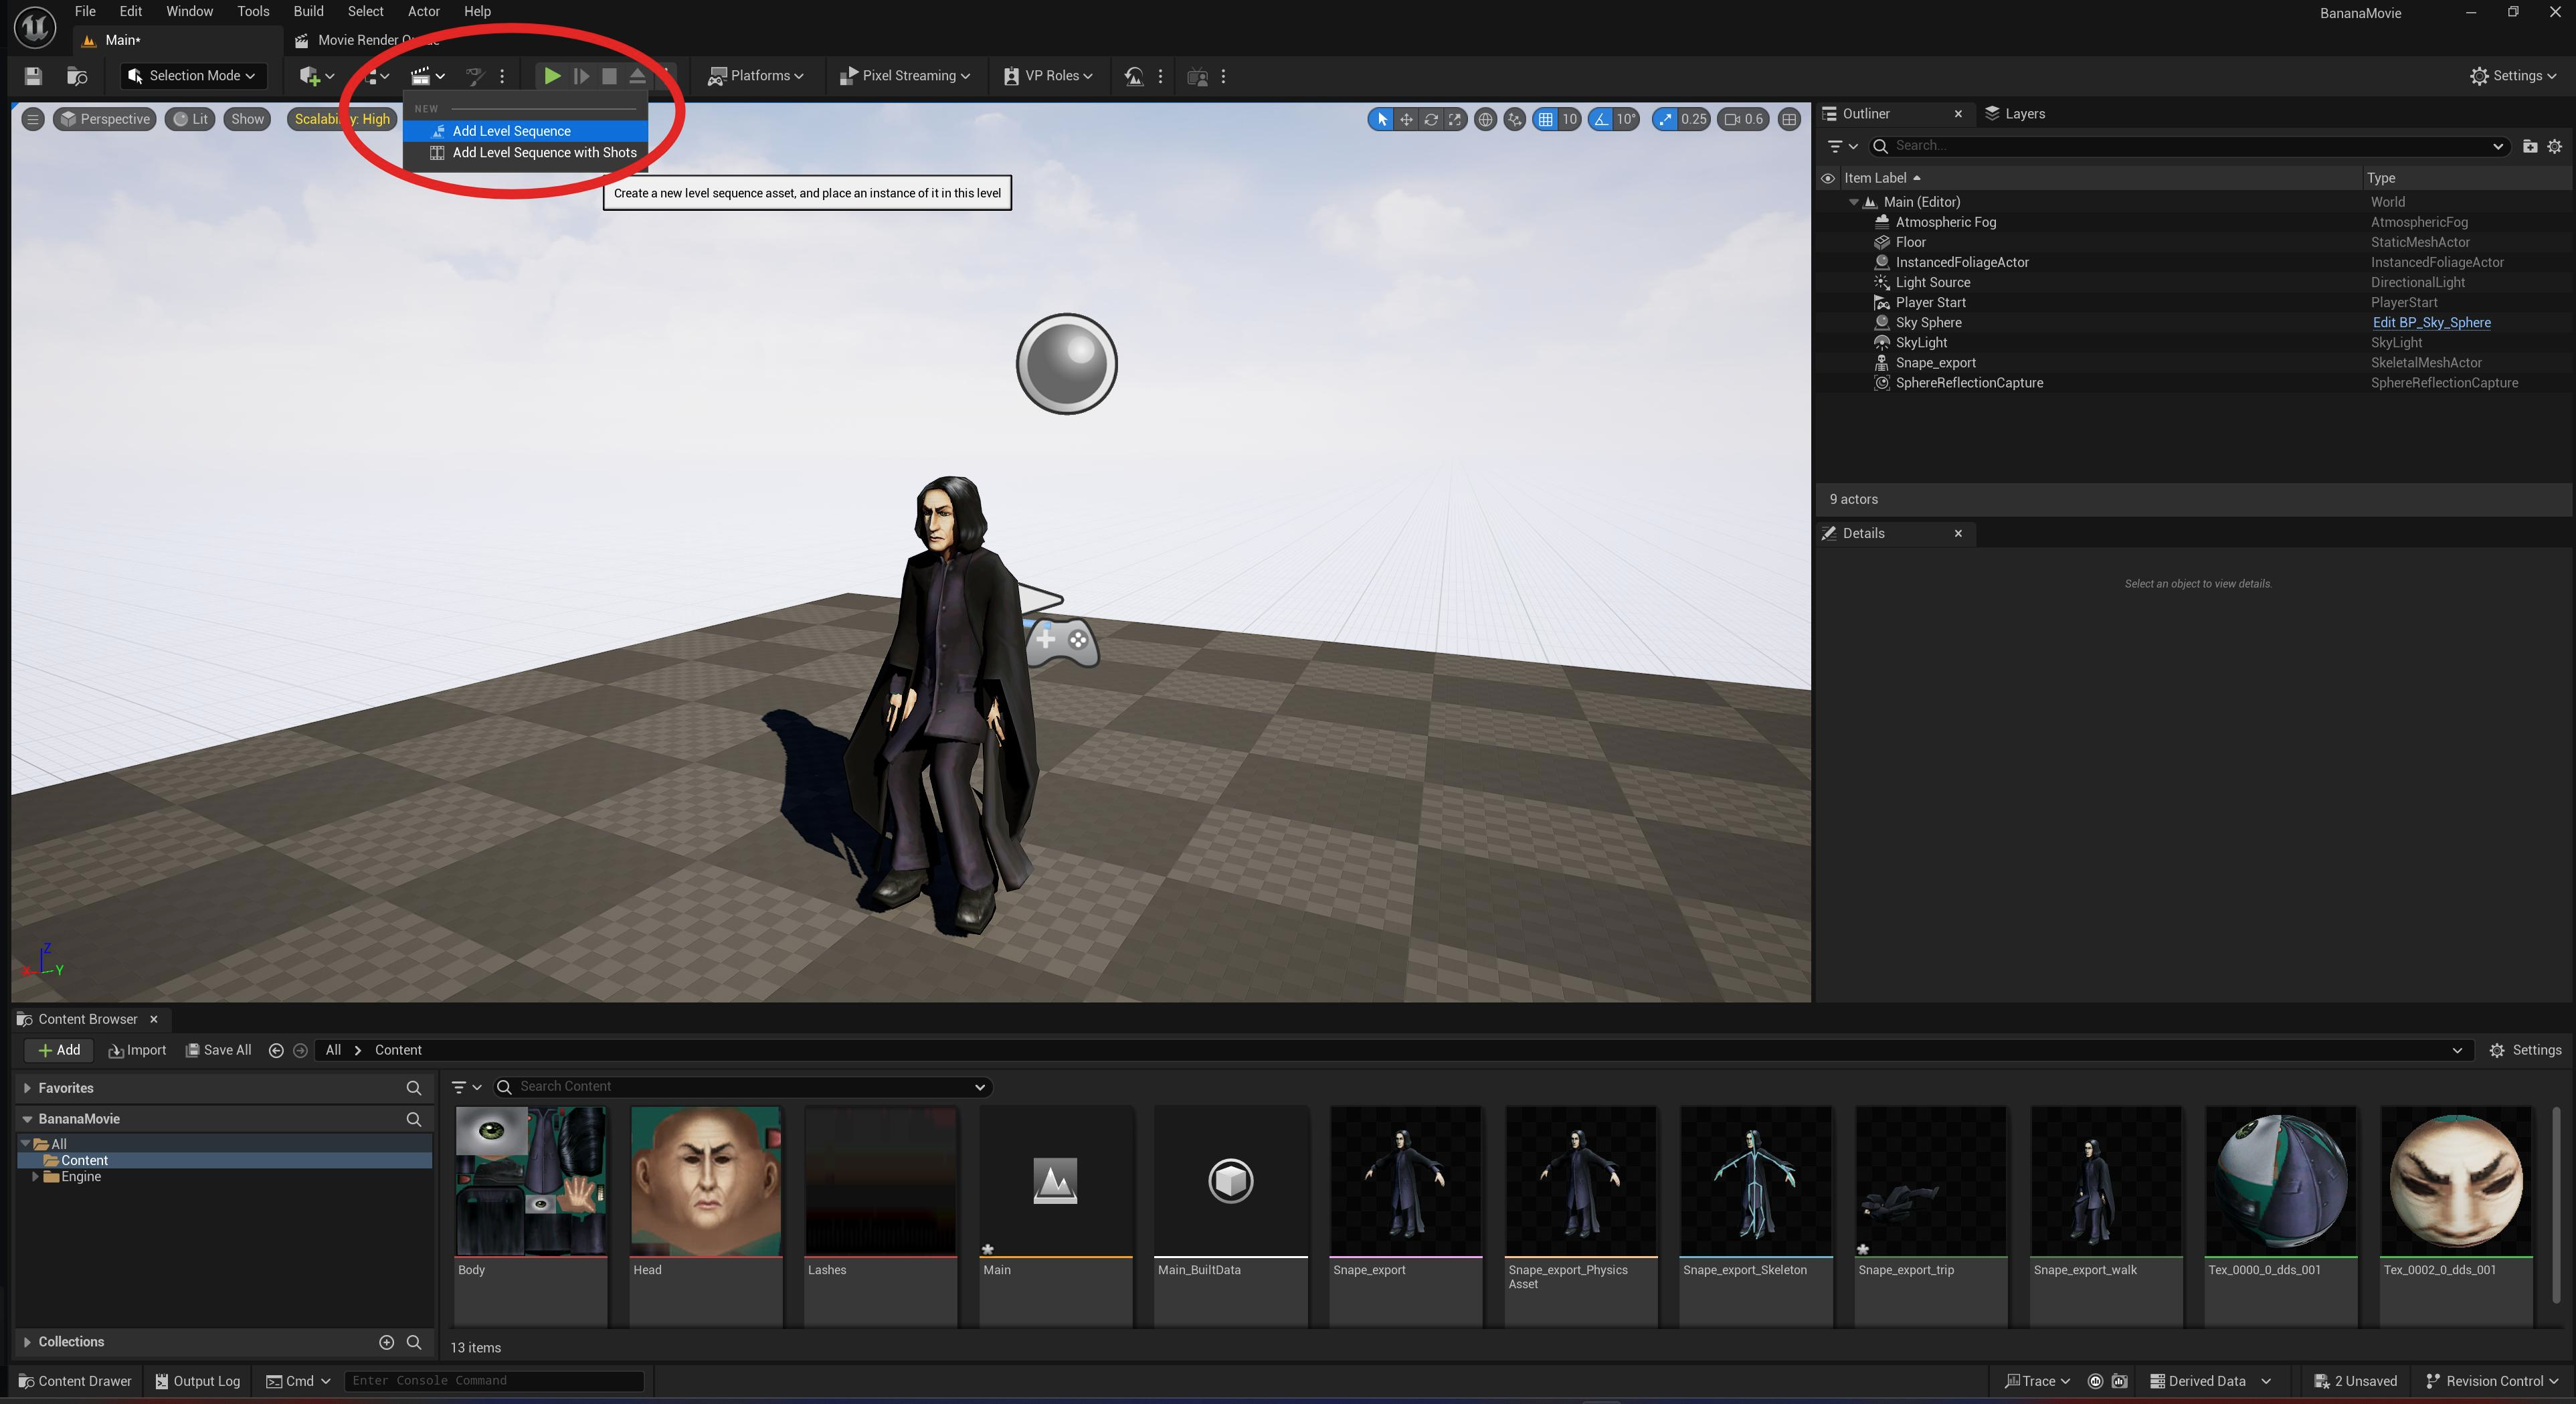
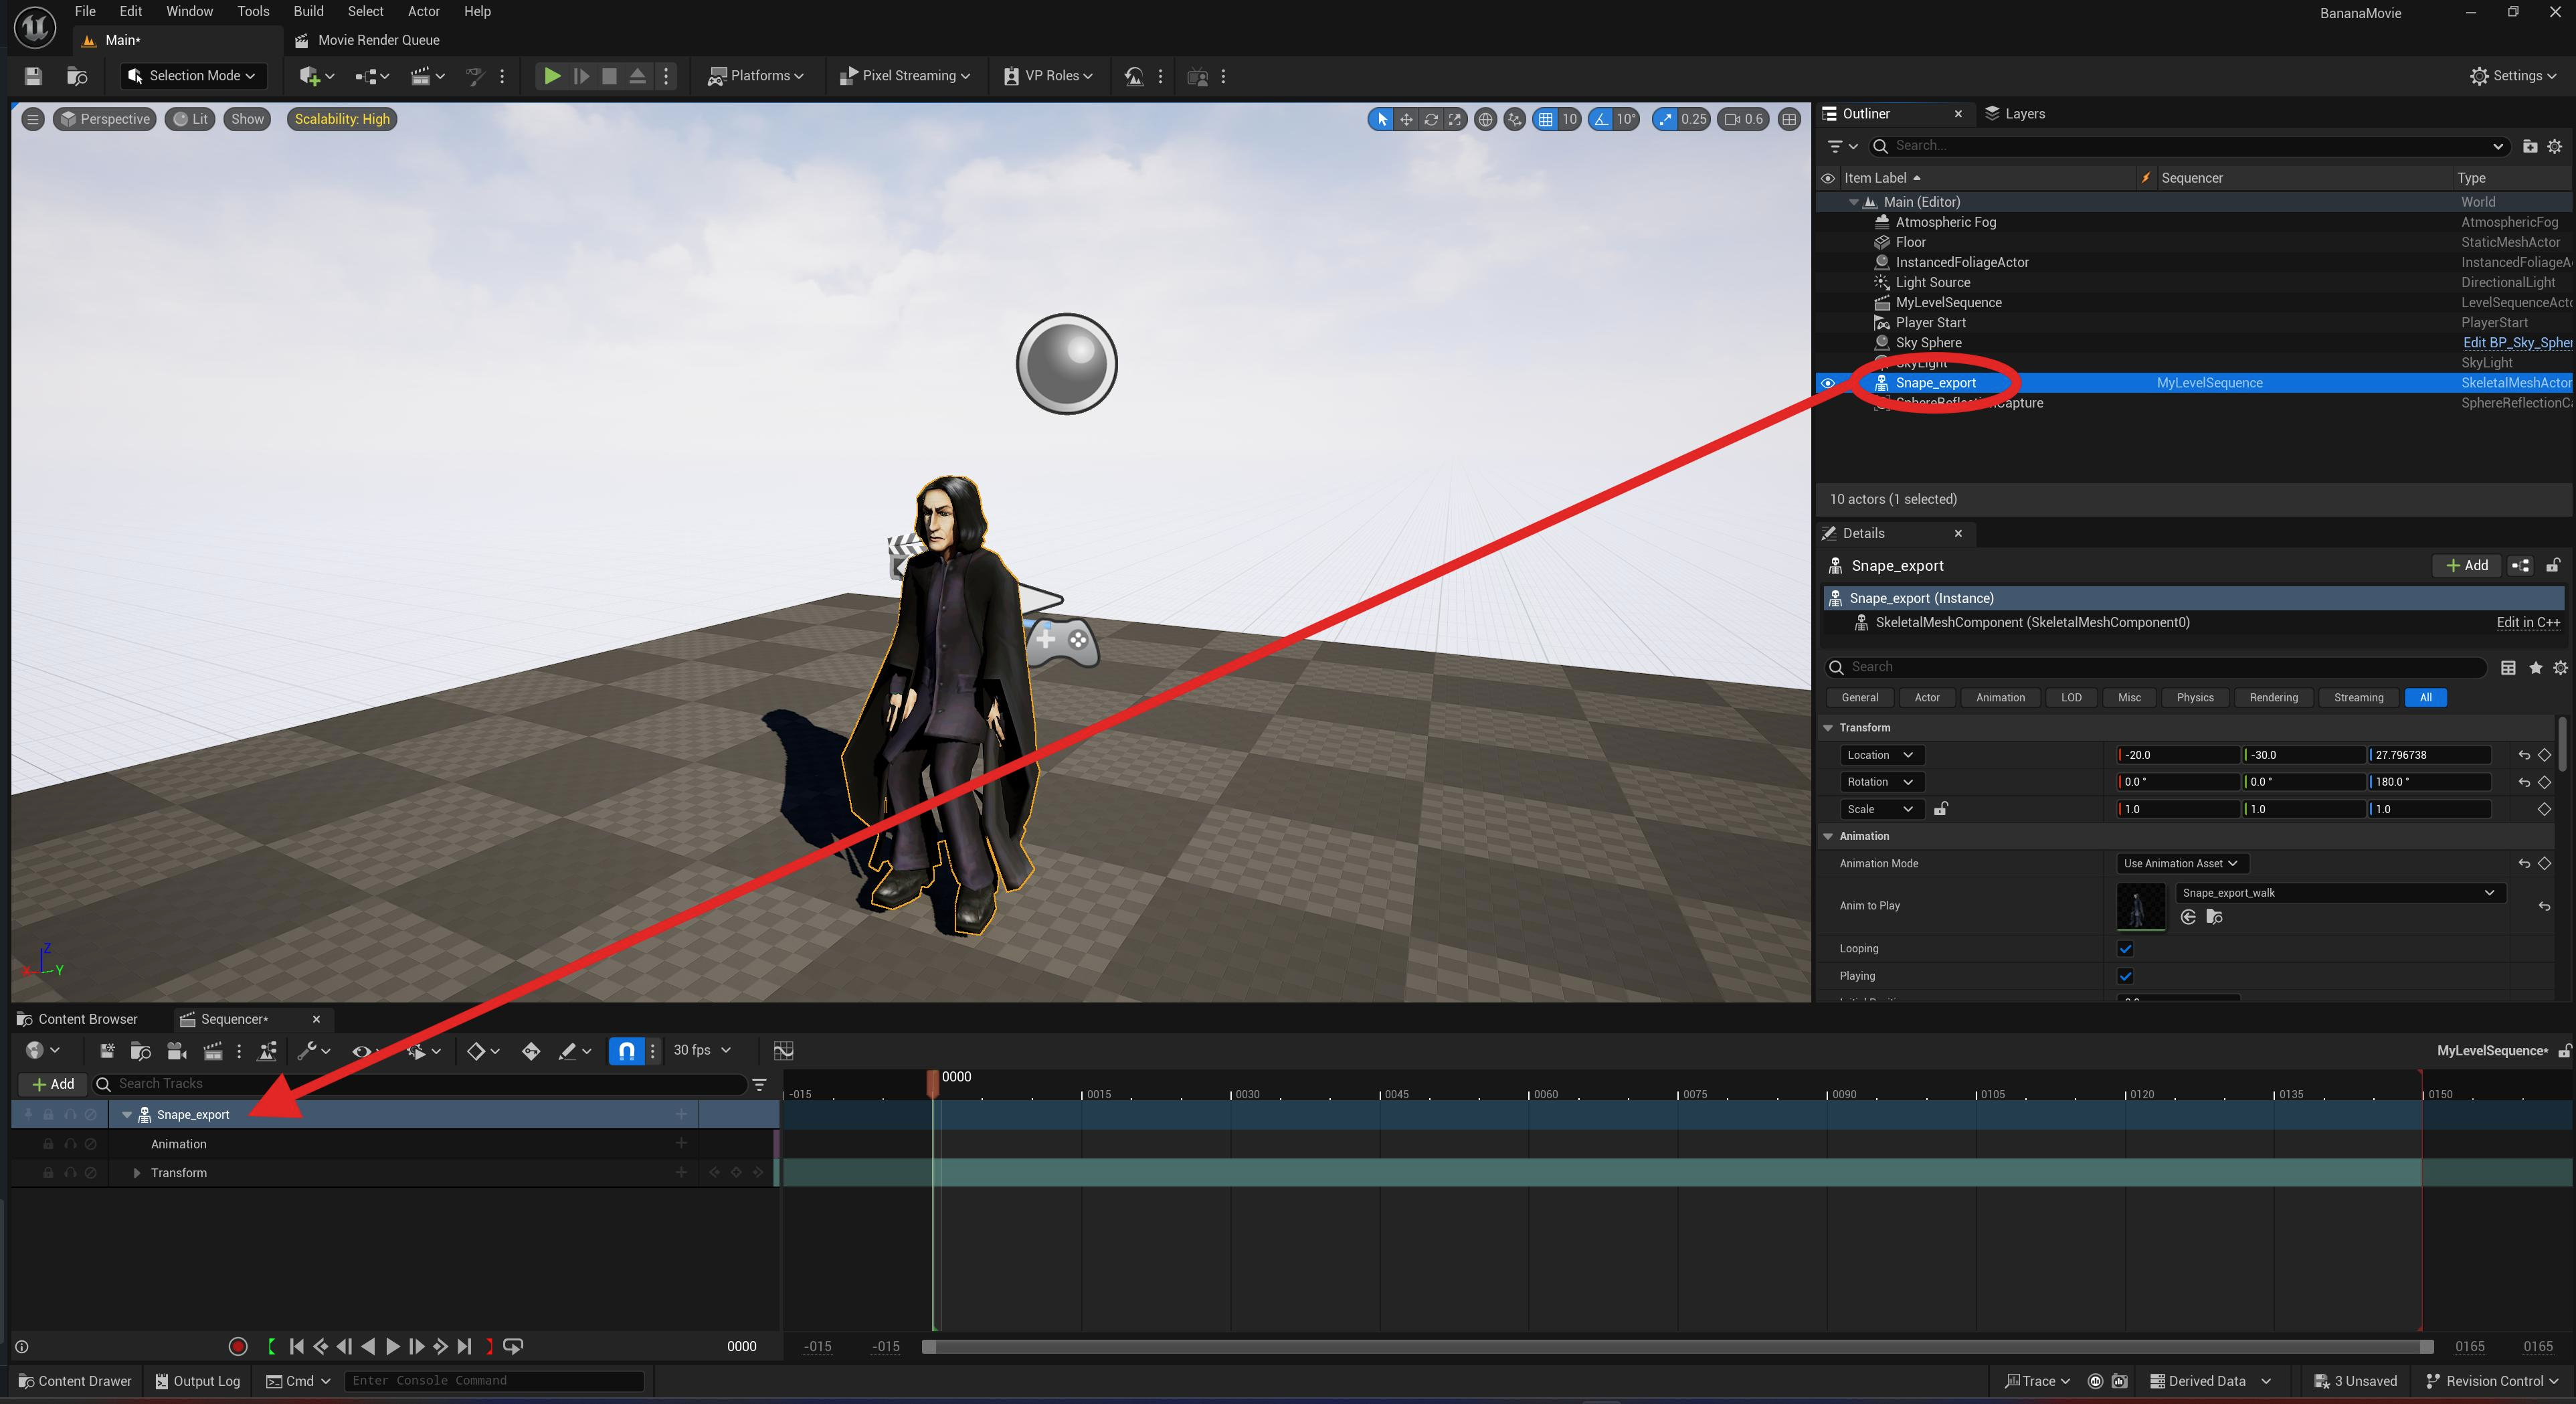
We can now see the walking animation working in our scene!
Create the first shot
Initialise the camera
With Snape now walking, let’s create the first shot of our cinematic.
To begin, let’s create a new Cine Camera Actor in our scene.

Selecting the newly created cinecamera in the outliner, let’s pilot it with the shortcut ctrl+shift+P.
Let’s pilot the camera to frame Snape in a medium closeup.
It’s a bit blurry at the moment, so try selecting the cinecamera and changing the current aperture value to ~4.6.
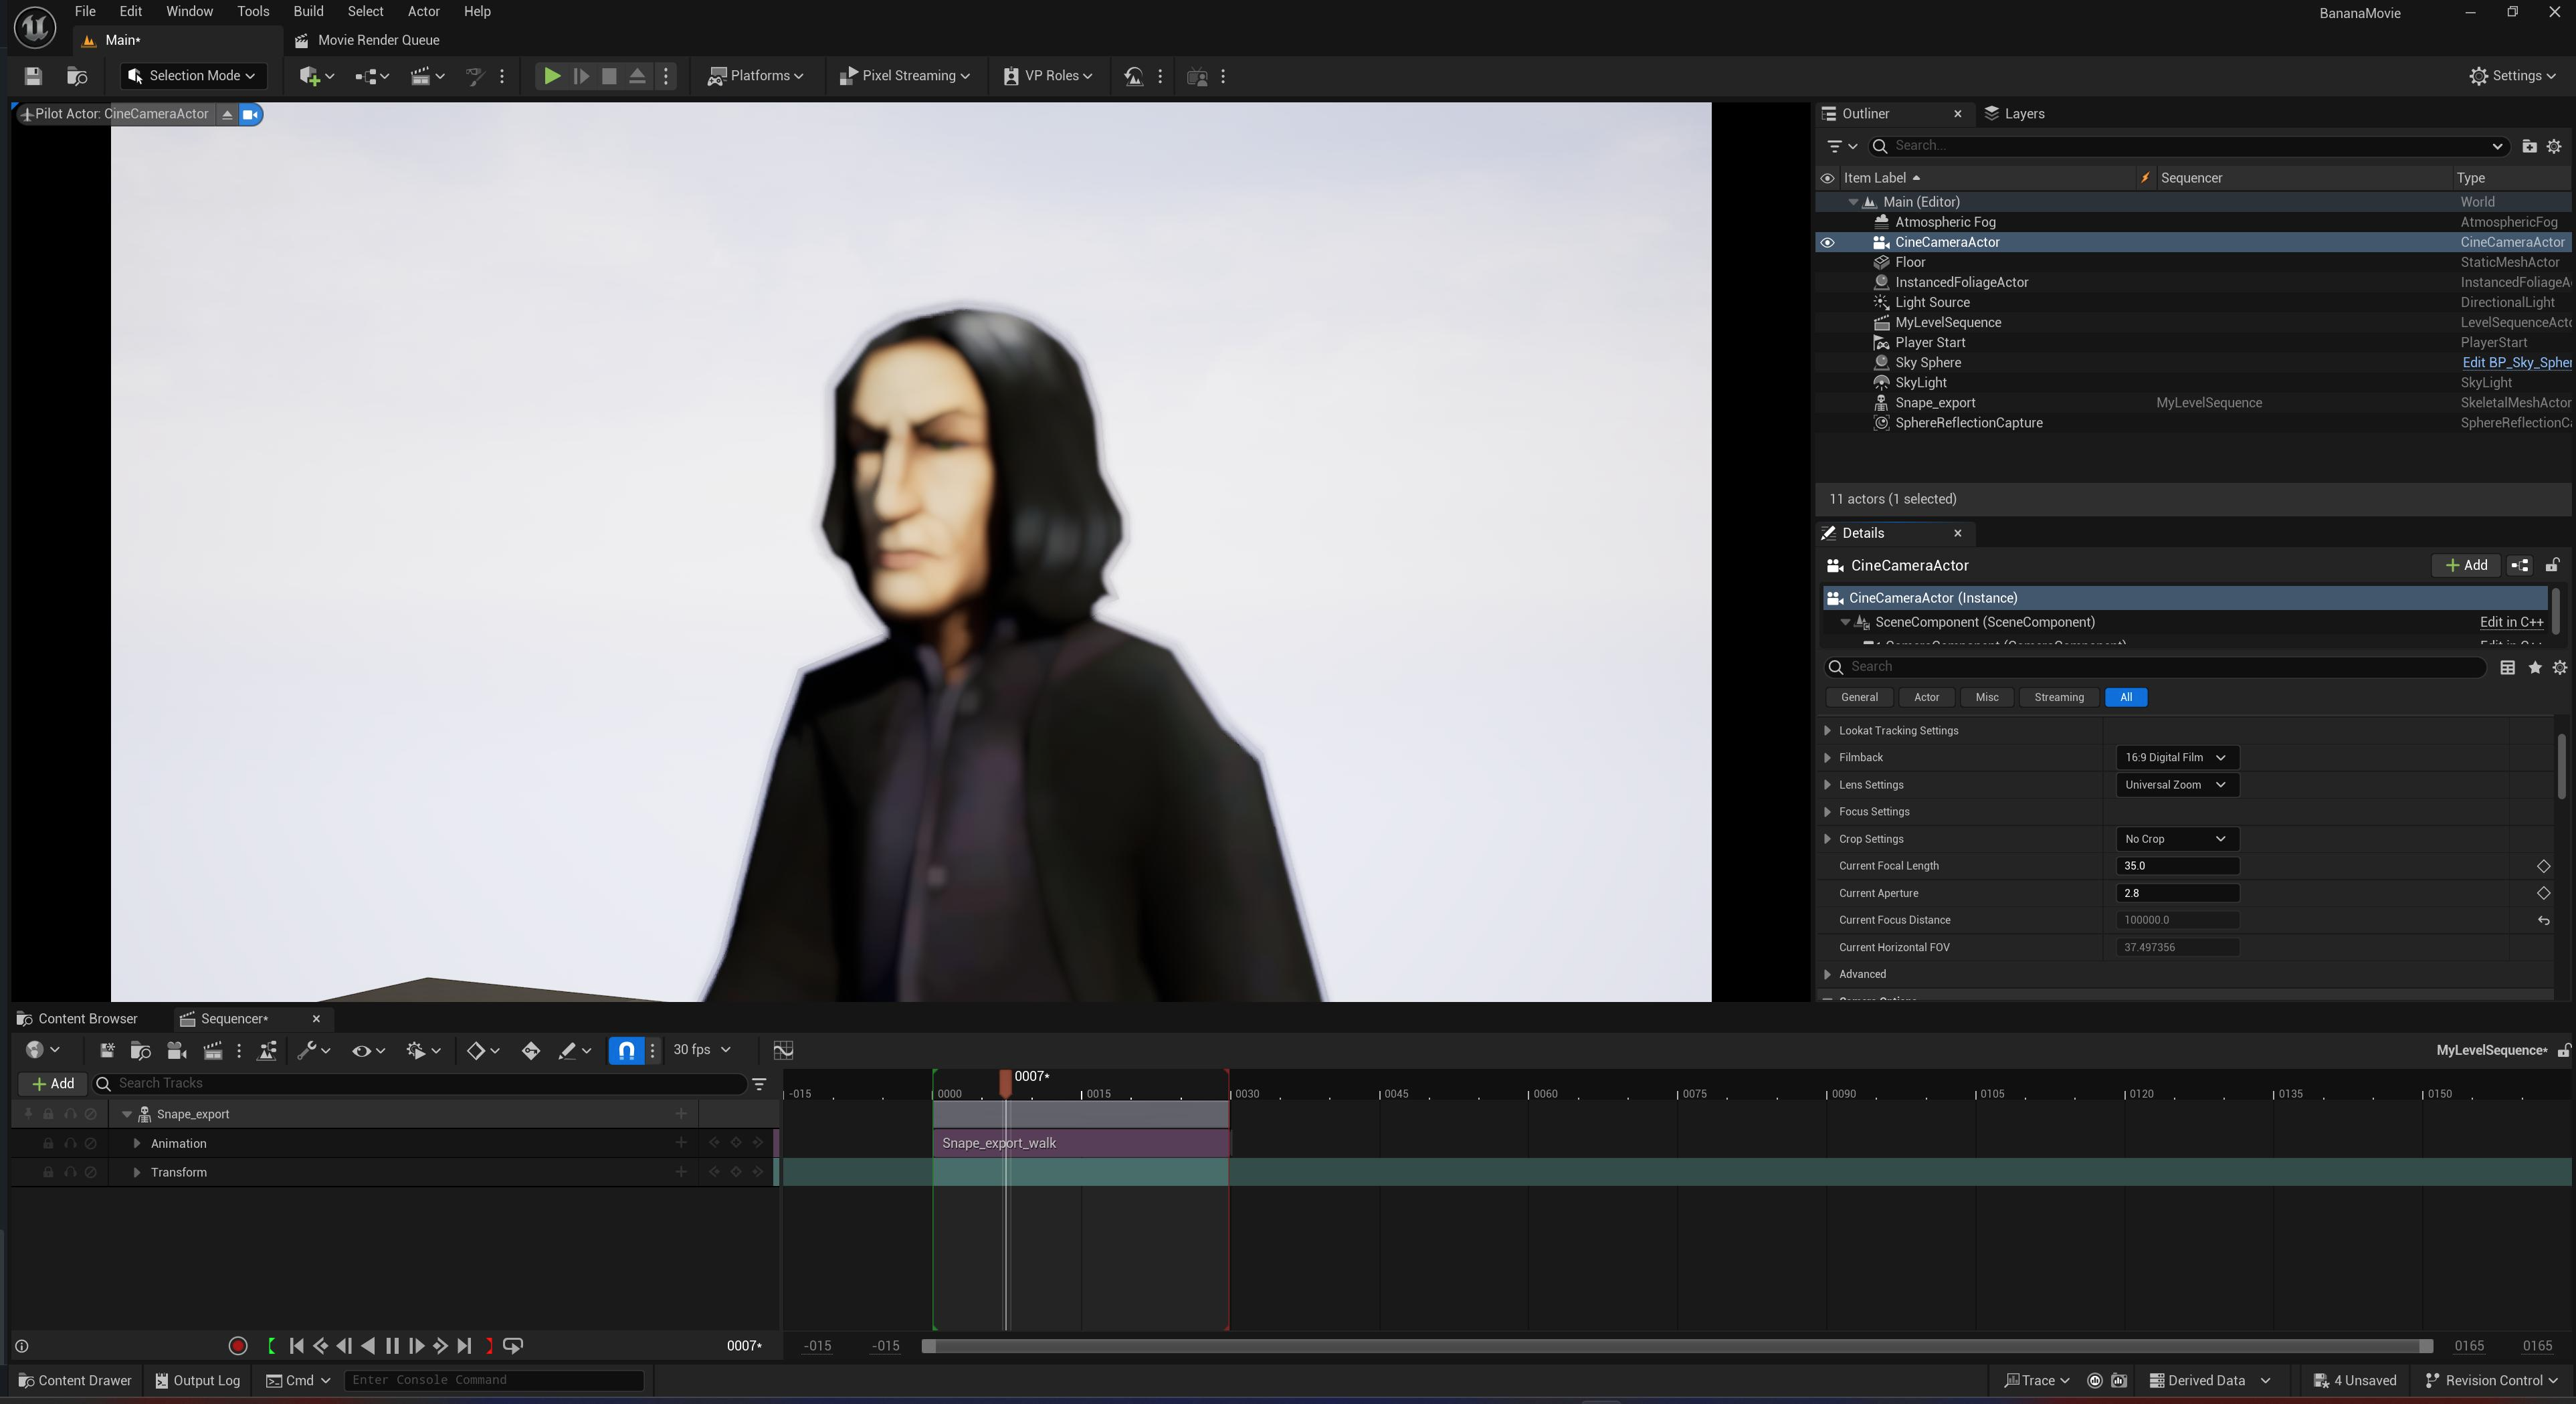
Let’s keyframe our camera position to preserve it.
Drag the cinecamera into the sequencer to create a new channel, and then click the add new keyframe button in the transform channel.

Make Snape walk forwards
Next, we’ll want Professor Snape to walk forwards instead of in place.
Let’s simply add two keyframes to his transform / Z location channel (creating start and end points), and now he’s actually moving forwards.
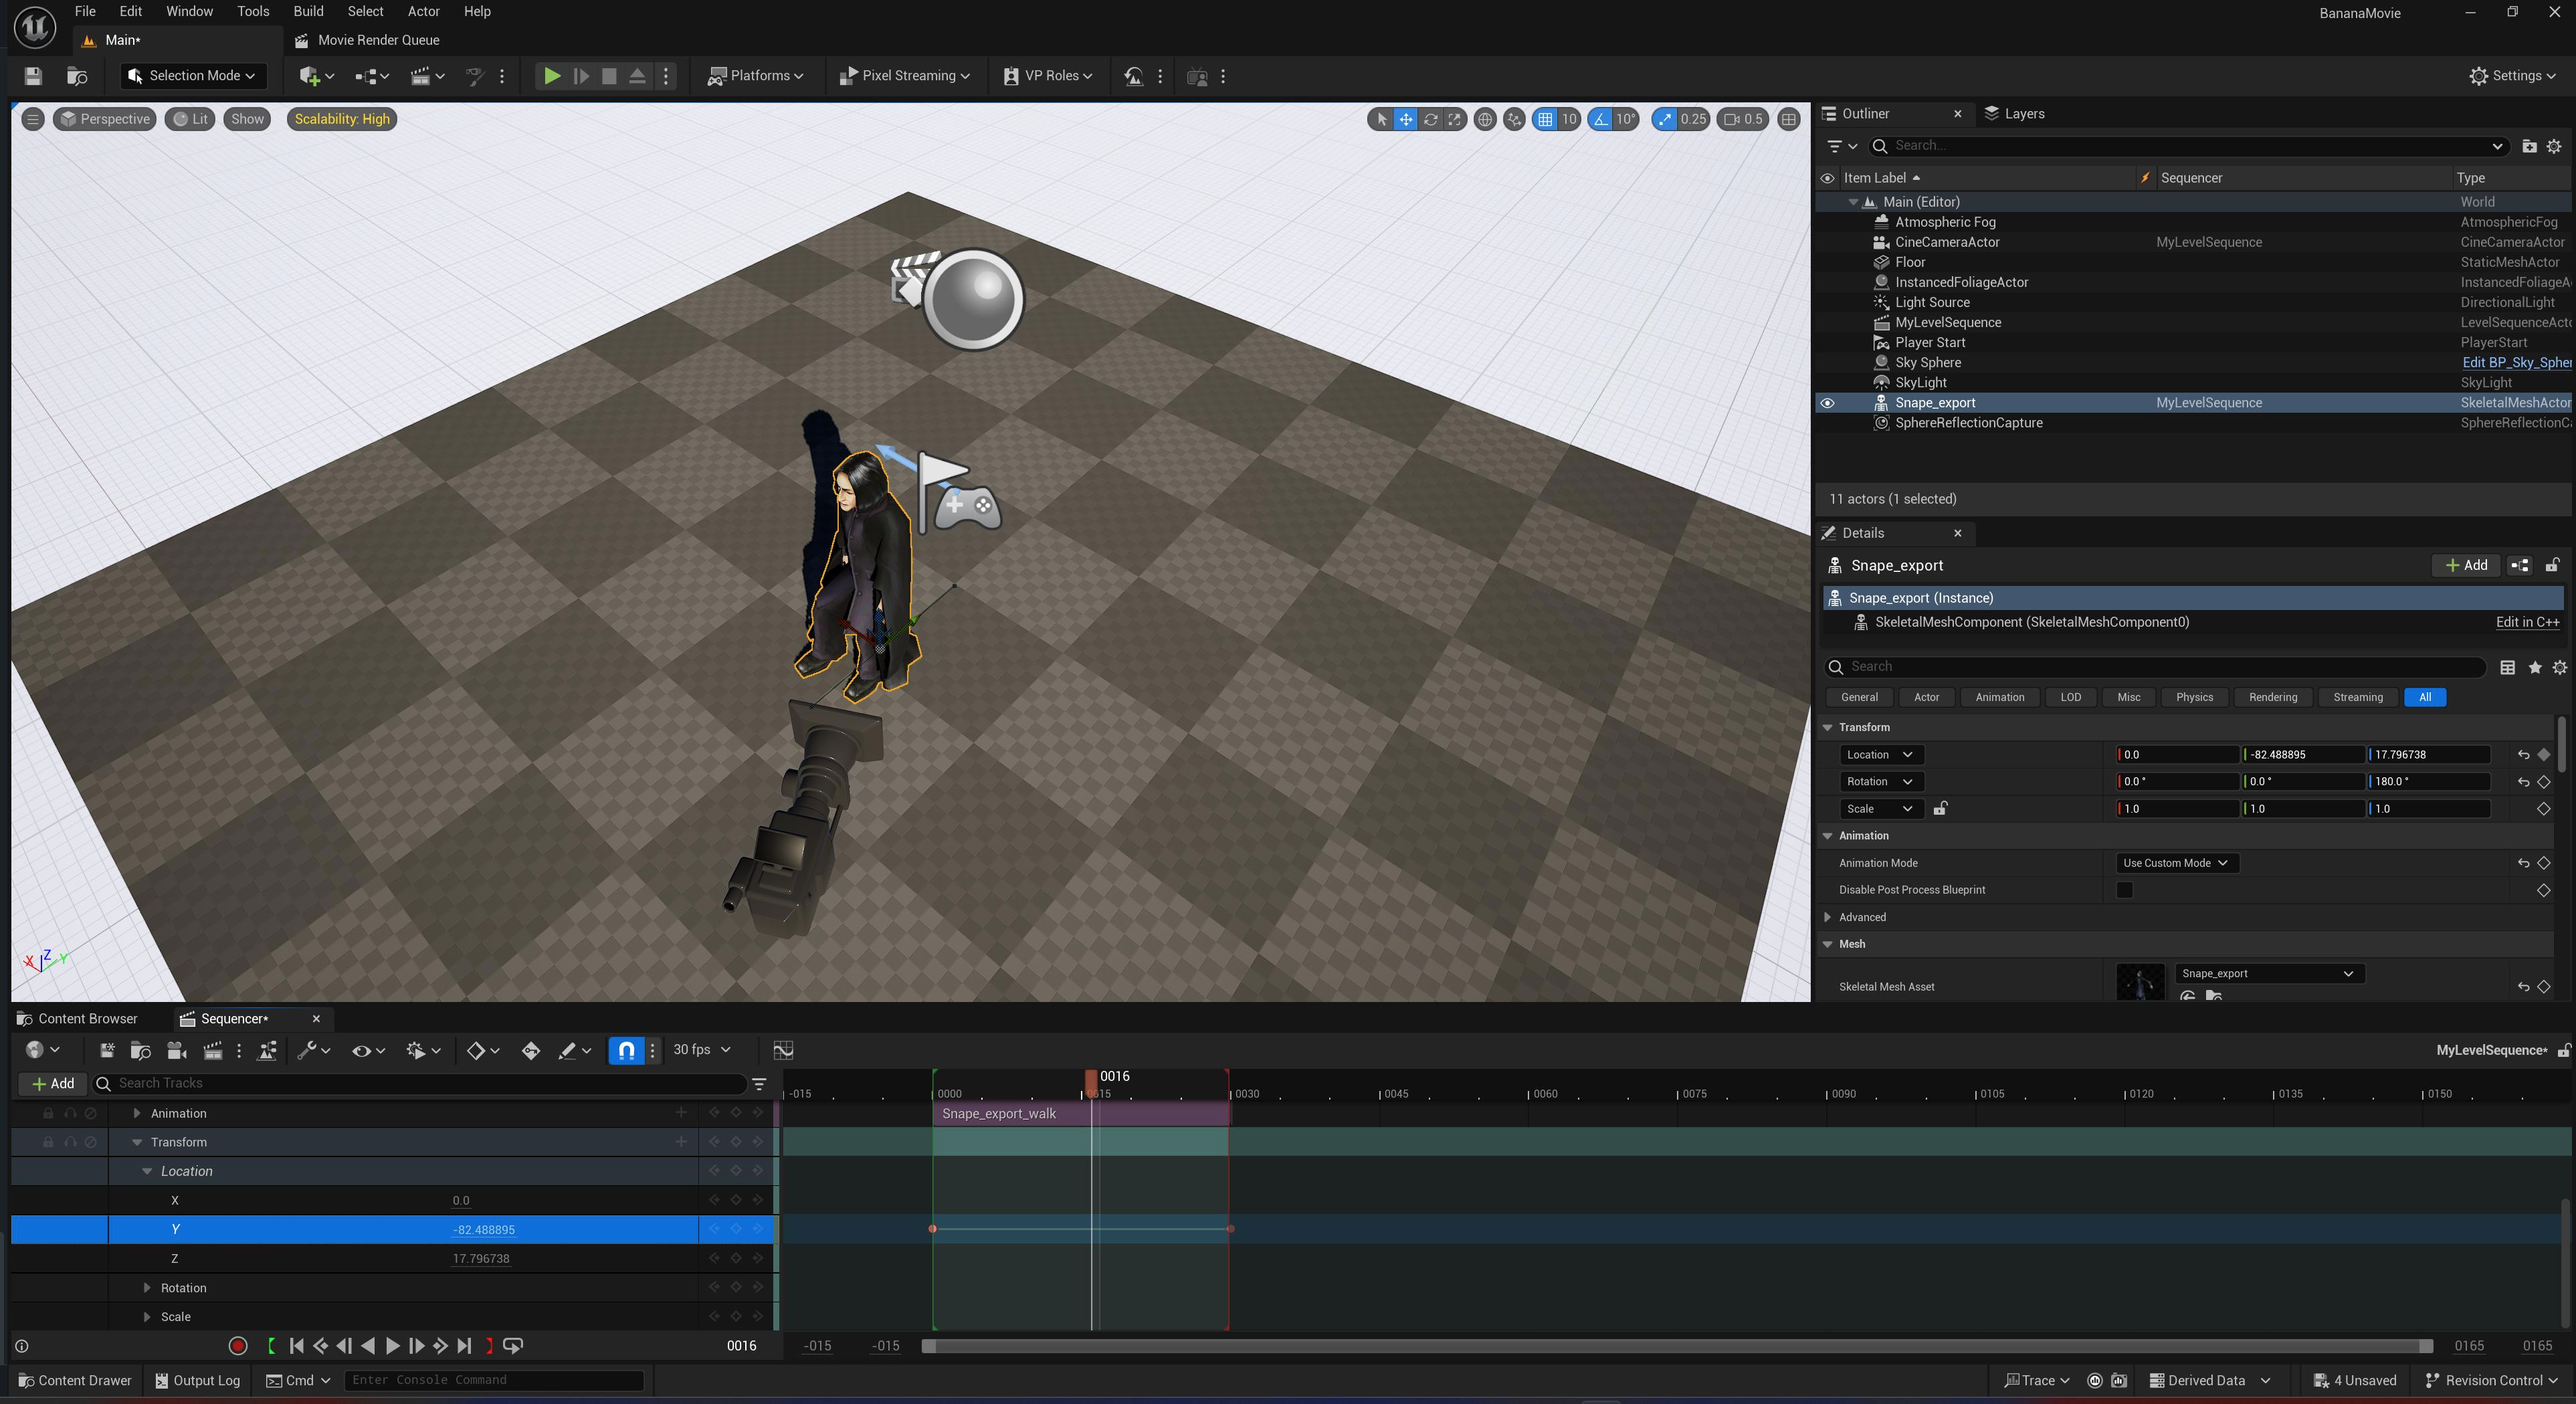
Linear keyframe interpolation
Set the interpolation of our Z location keyframes to linear by right-clicking the keyframes and changing the key interpolation value!
Next, we want the camera to follow Snape as he shuffles along.
Inside the outliner, drag your cinecamera underneath Snape to create a parent-child hierarchy.
- in the pop-up menu, set the socket or bone to None.
Now wherever Snape goes, the camera follows!
(Unfortunately, this messes up the camera framing we established earlier. Simply pilot the camera again to create the same framing we had before, and then replace our previous camera transform keyframe.

Creating the background environment
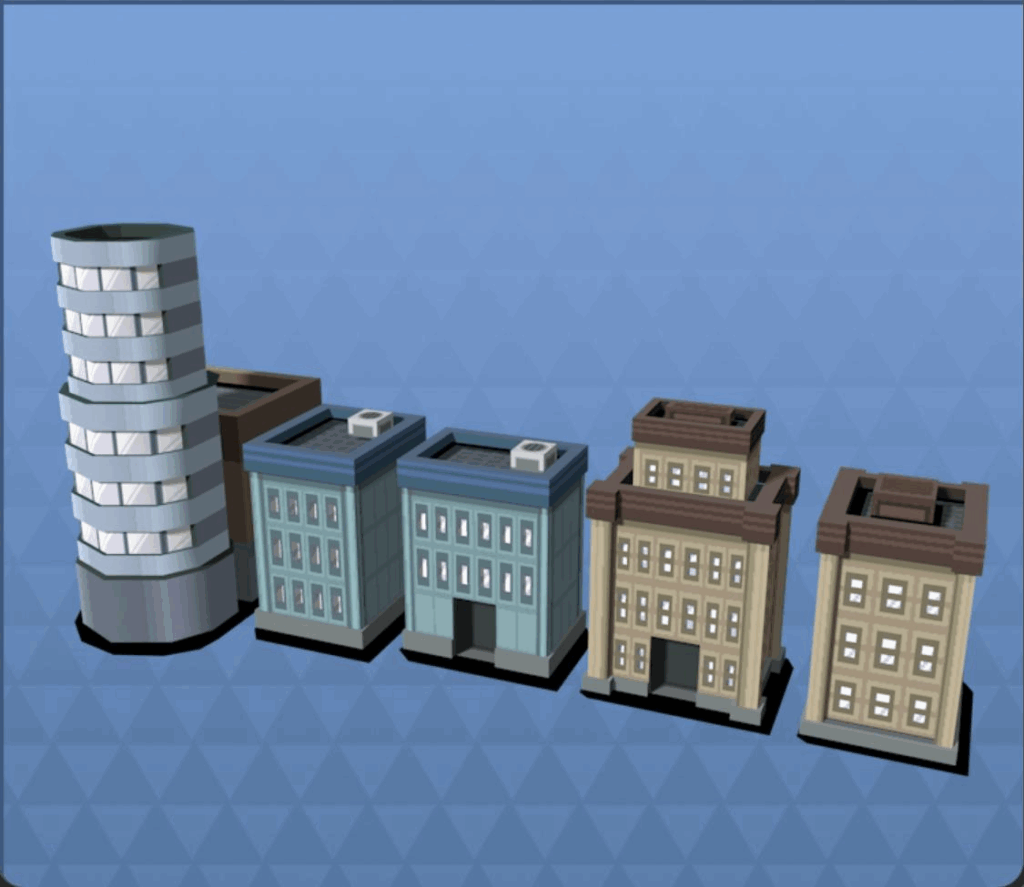
To create a nice city environment for the background, I started creating a simple cityscape using these Jubilife city buildings from Pokémon Platinum.

Blurring the background
Let’s create a bit of depth in our scene by blurring the background environment behind Snape.
Selecting your cinecamera, under Focus Settings:
- set the focus method to manual.
- next to the manual focus distance value, click the eyedropper and then click Snape. The distance value will update automatically!
Now adjust the current aperture value such that the background is slightly blurred!

Updating the background environment
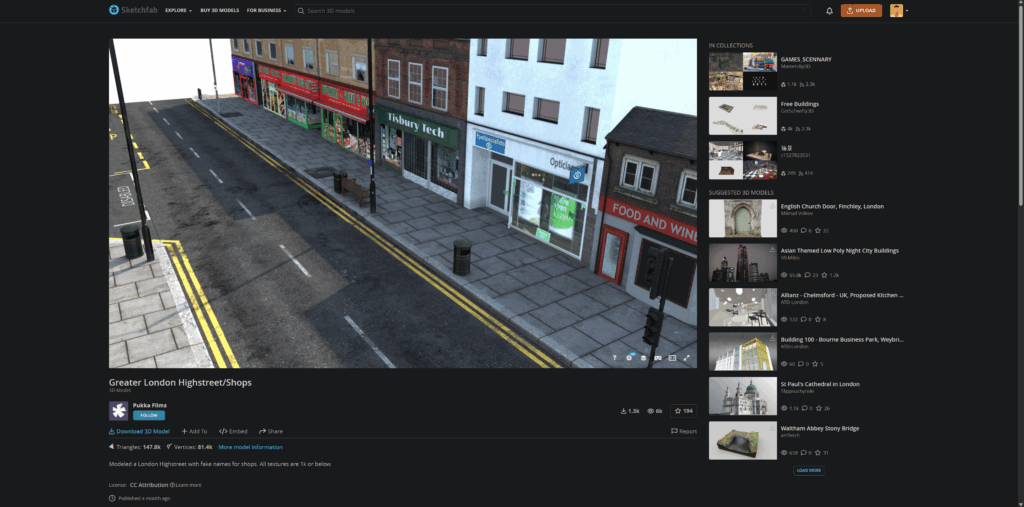
The Jubilife city buildings aren’t looking so great, so I did some asset-hunting and found this awesome London street asset by Sketchfab user Pukka Films!
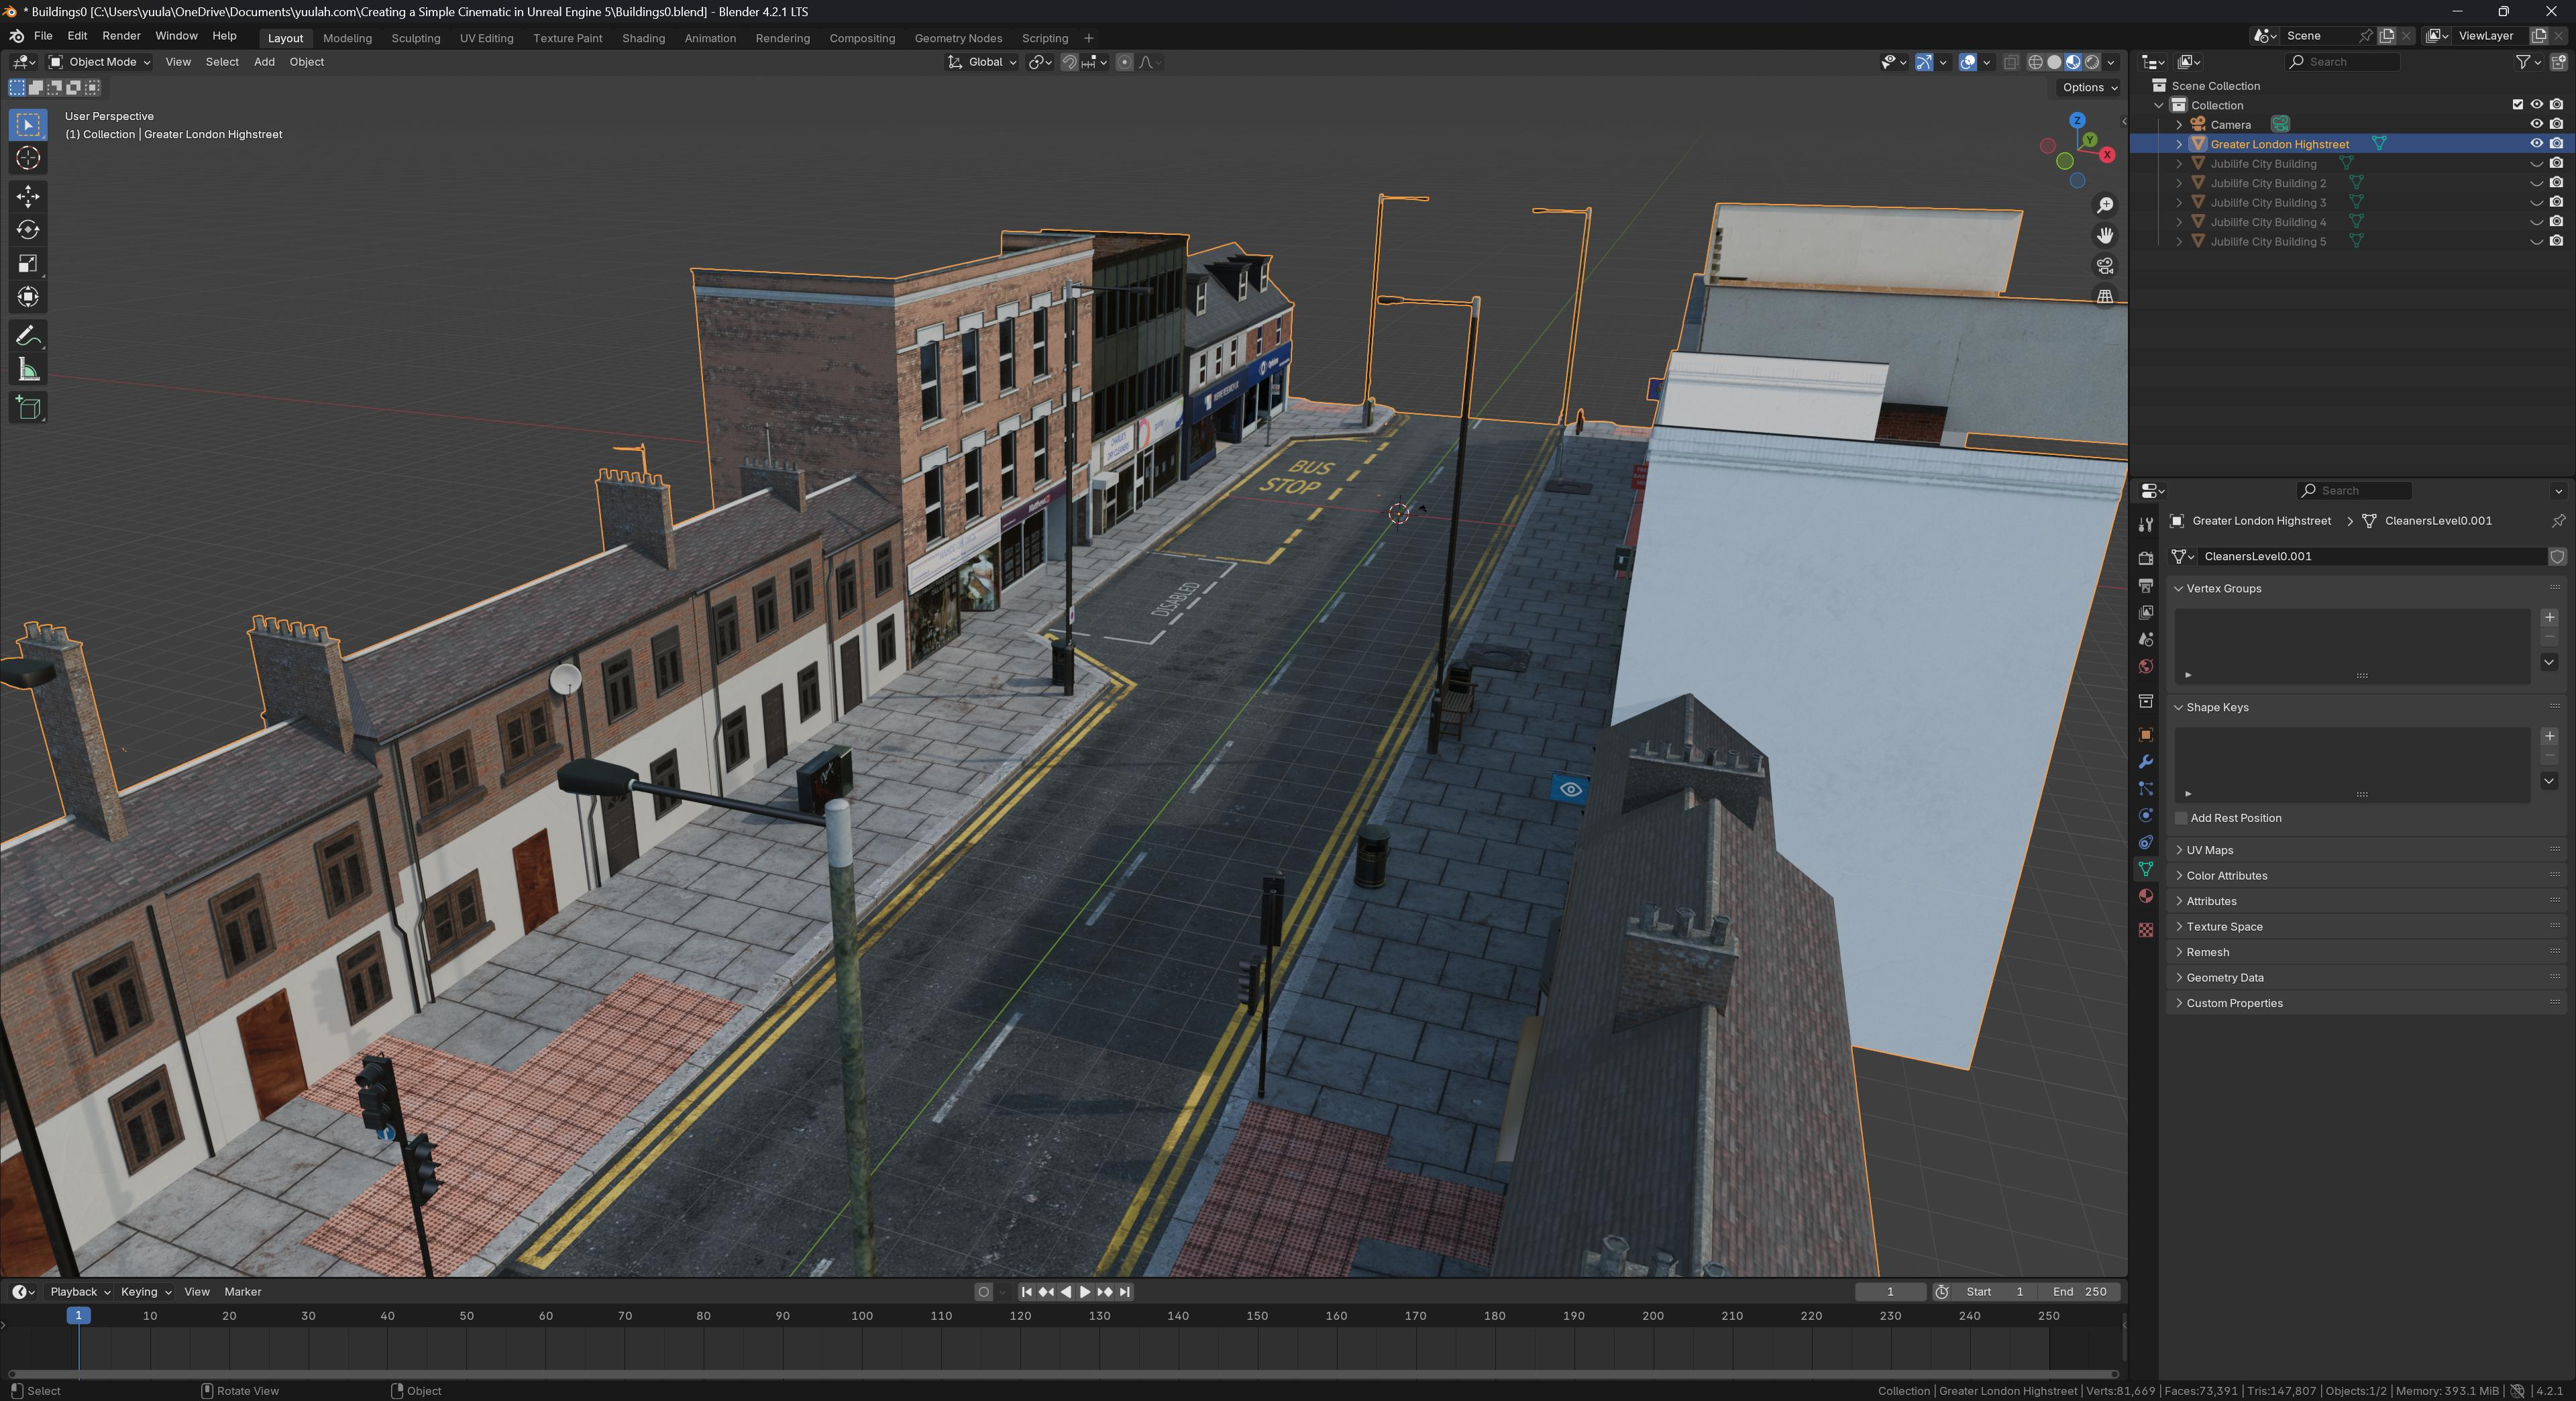
I imported the FBX into Blender and combined all the meshes into one object.
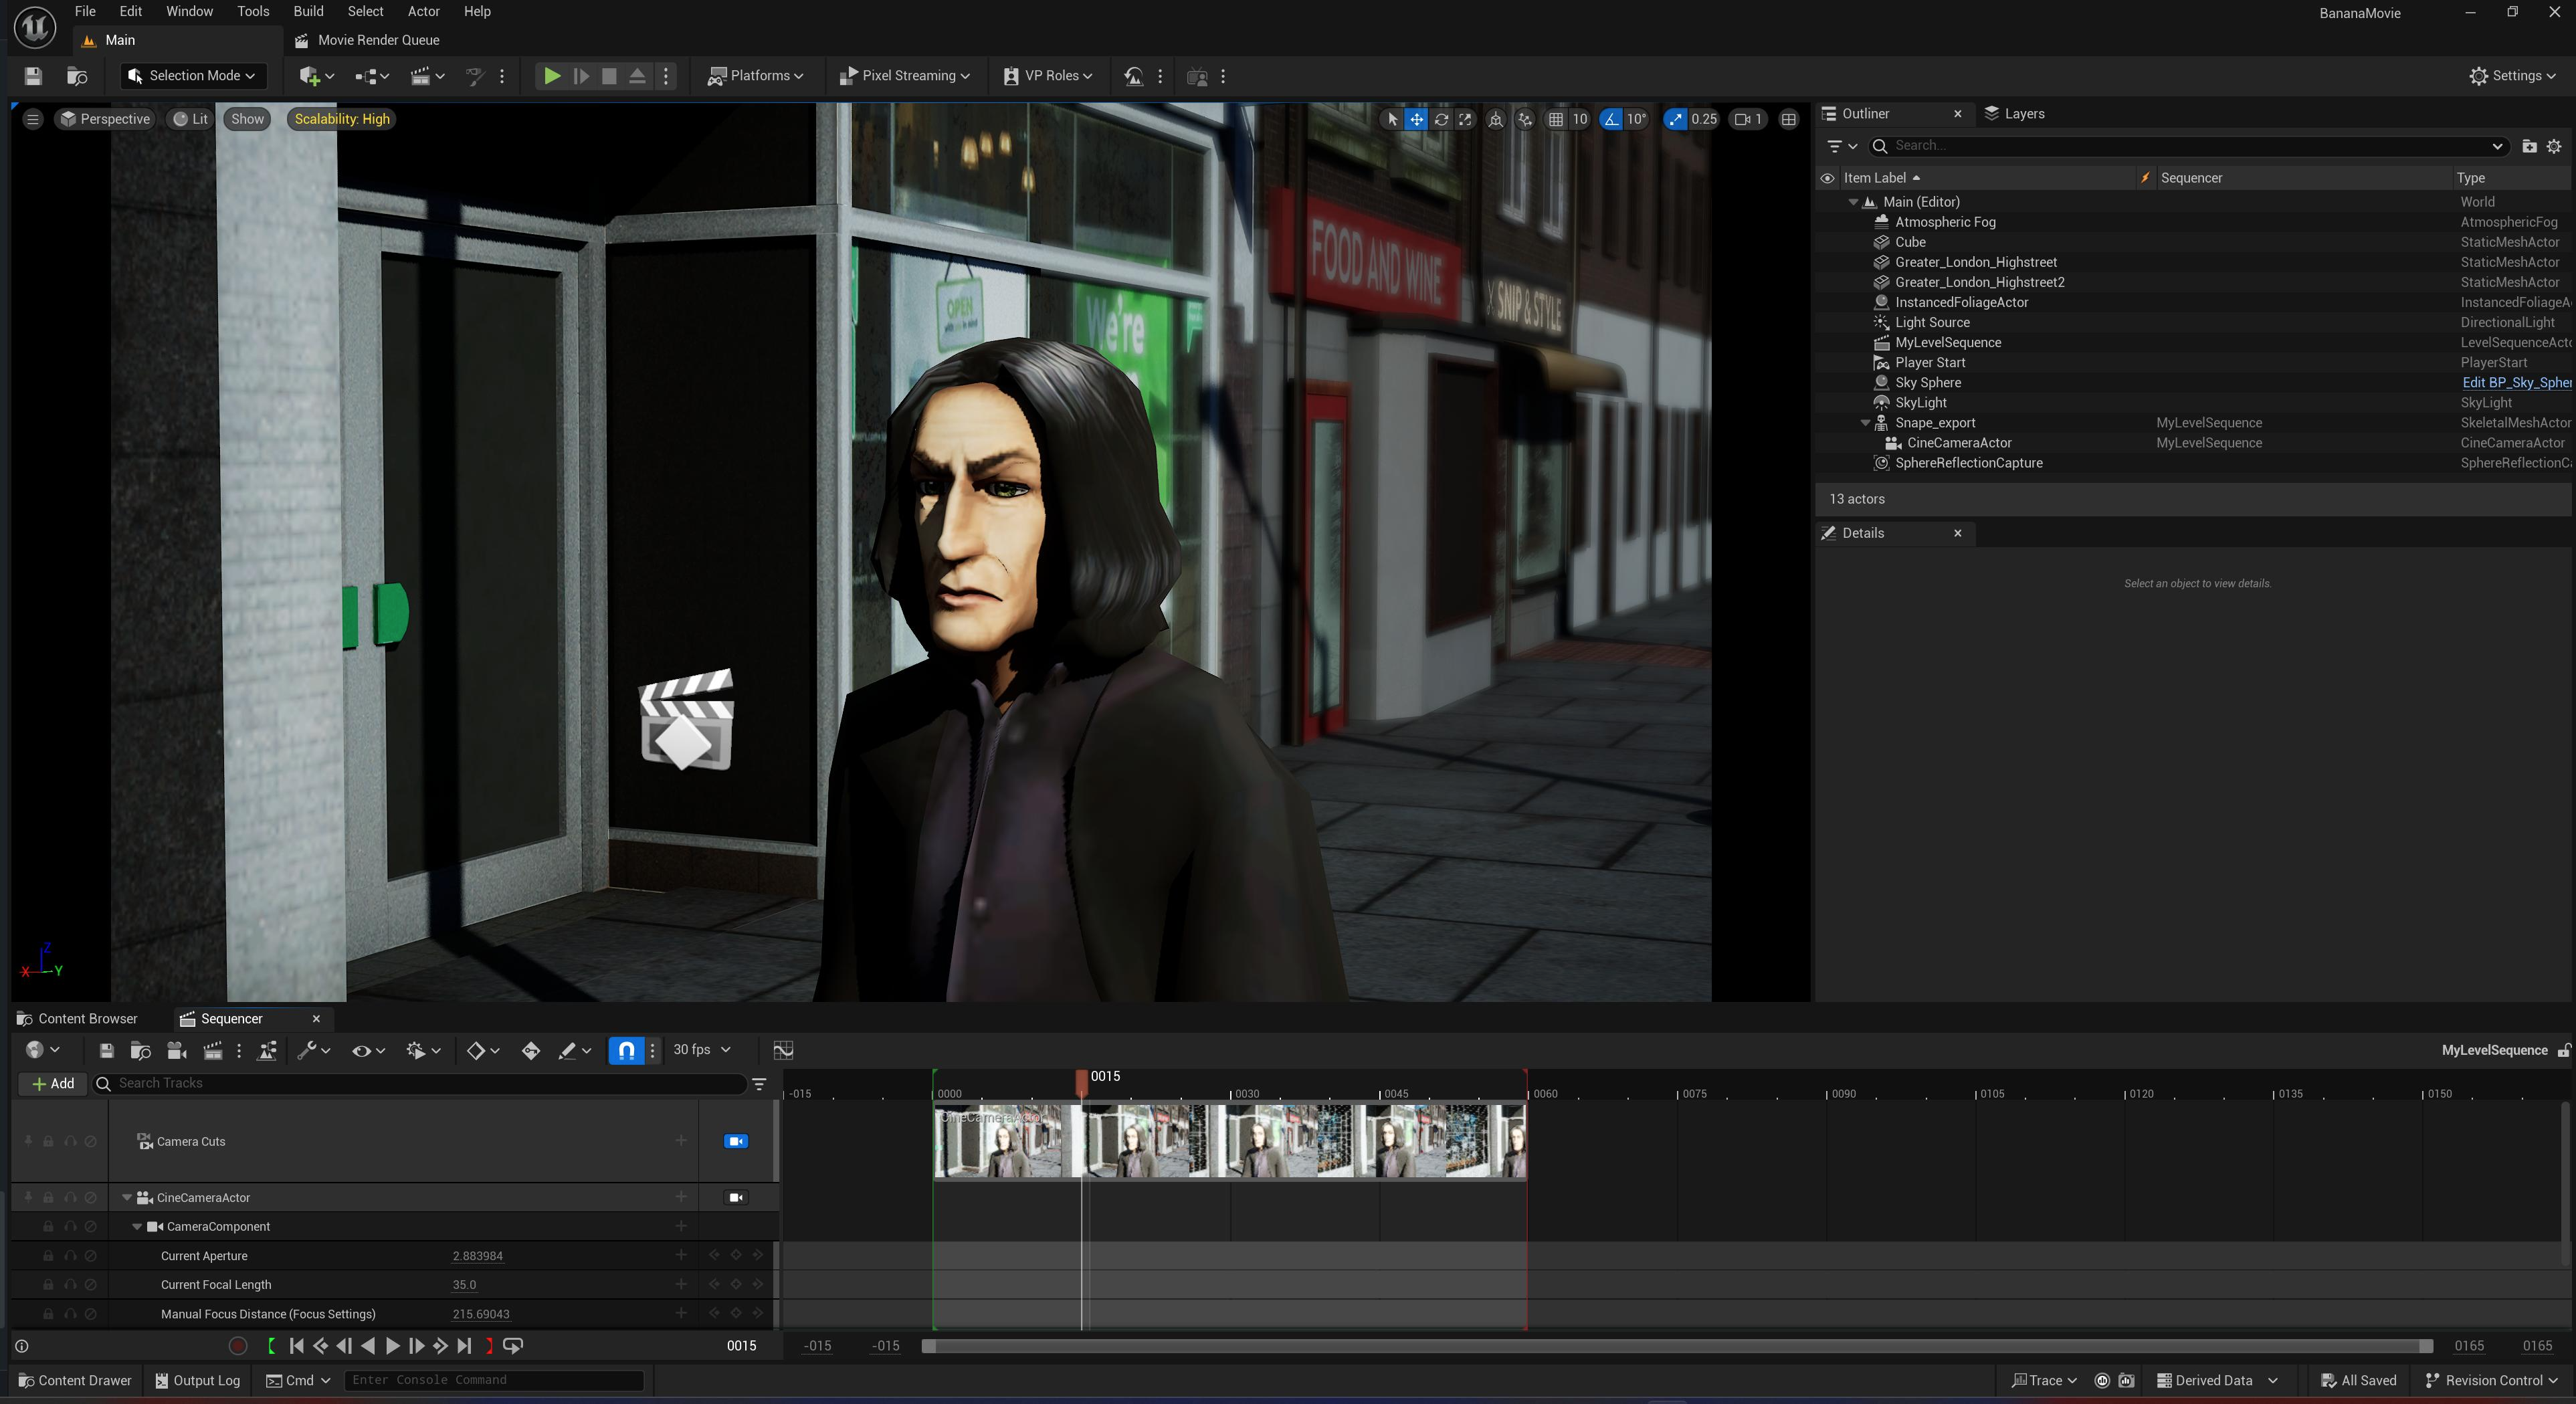
I then exported an FBX from Blender and imported into UE – our scene is now looking a lot livelier!
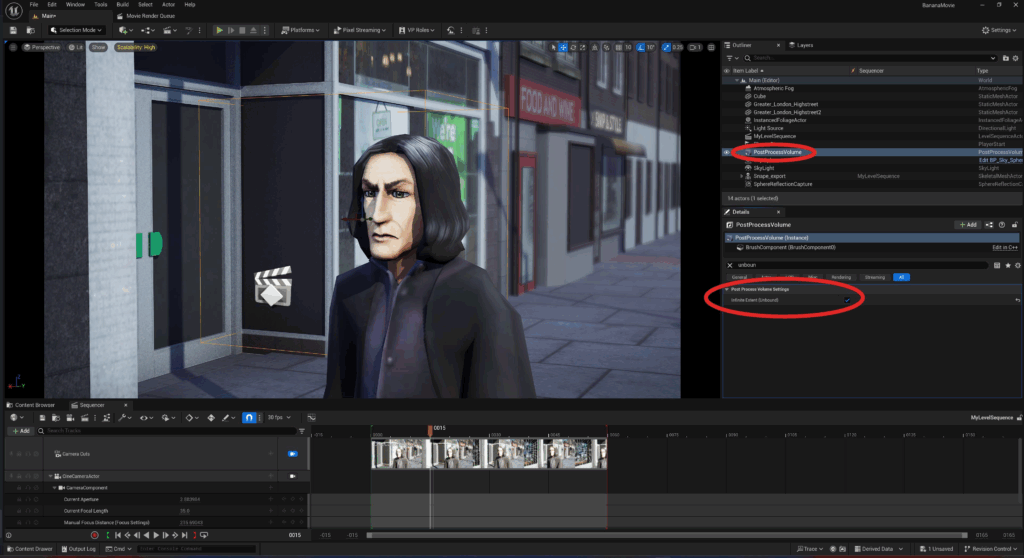
Post-Processing
Currently our scene needs a bit of post-process adjustment, as we can see details like the shadow on Snape’s face are just a bit too intense.
To fix this, let’s add a Post Process Volume to our scene.
- check the property Infinite Extent (Unbound) to make this volume affect our entire level/scene.
Already, the shadows in our scene are looking a lot better!
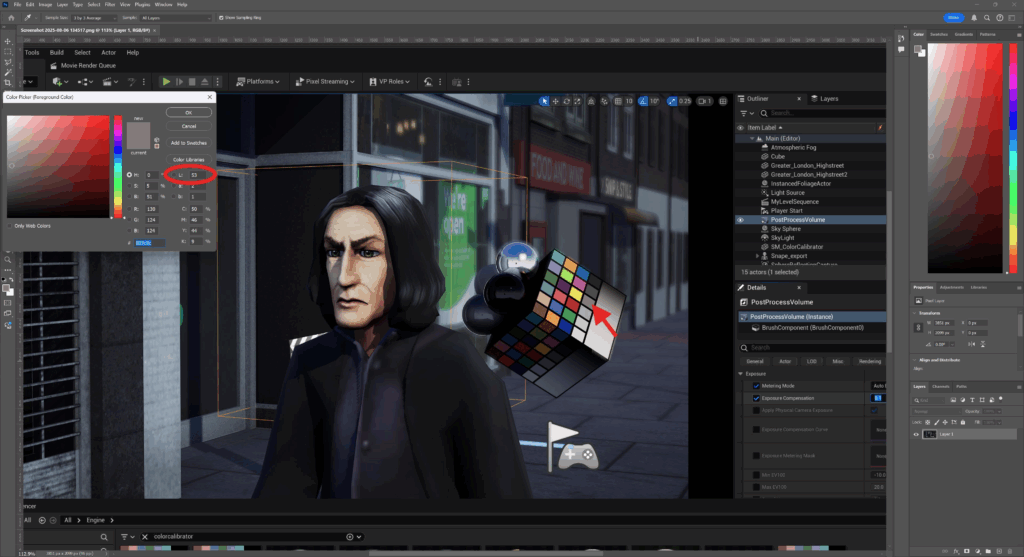
Exposure compensation using the Color Calibrator
Let’s adjust the exposure of our shot a little more precisely.
Let’s begin by bringing the SM_Color actor into our scene.
- you can search for this in the Content Browser / Engine Content (make sure Settings / Show Engine Content is enabled).
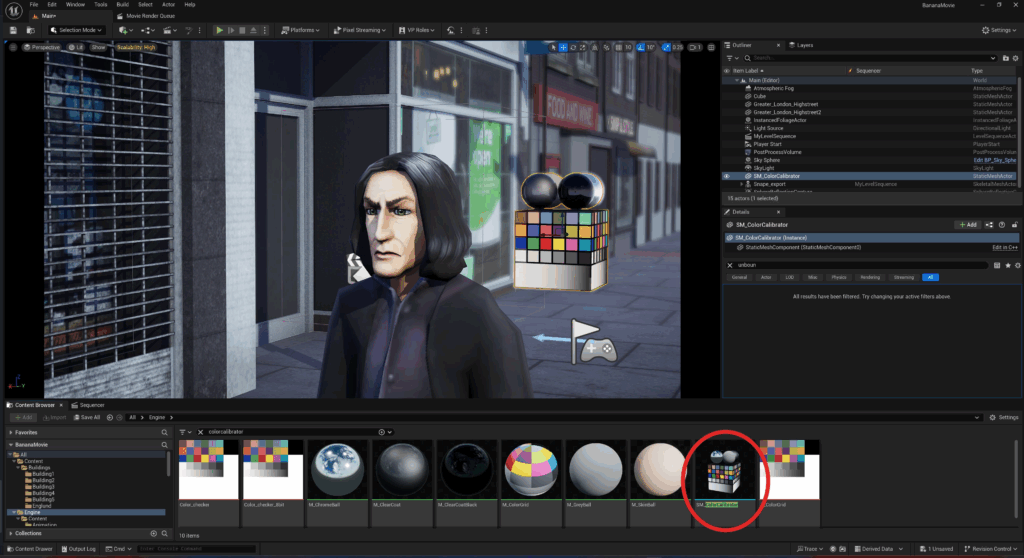
Next, we’ll want to align our ColorCalibrator to our scene Directional Light.
- copy the Rotation value of your scene DirectionalLight, and then paste this value onto your ColorCalibrator.
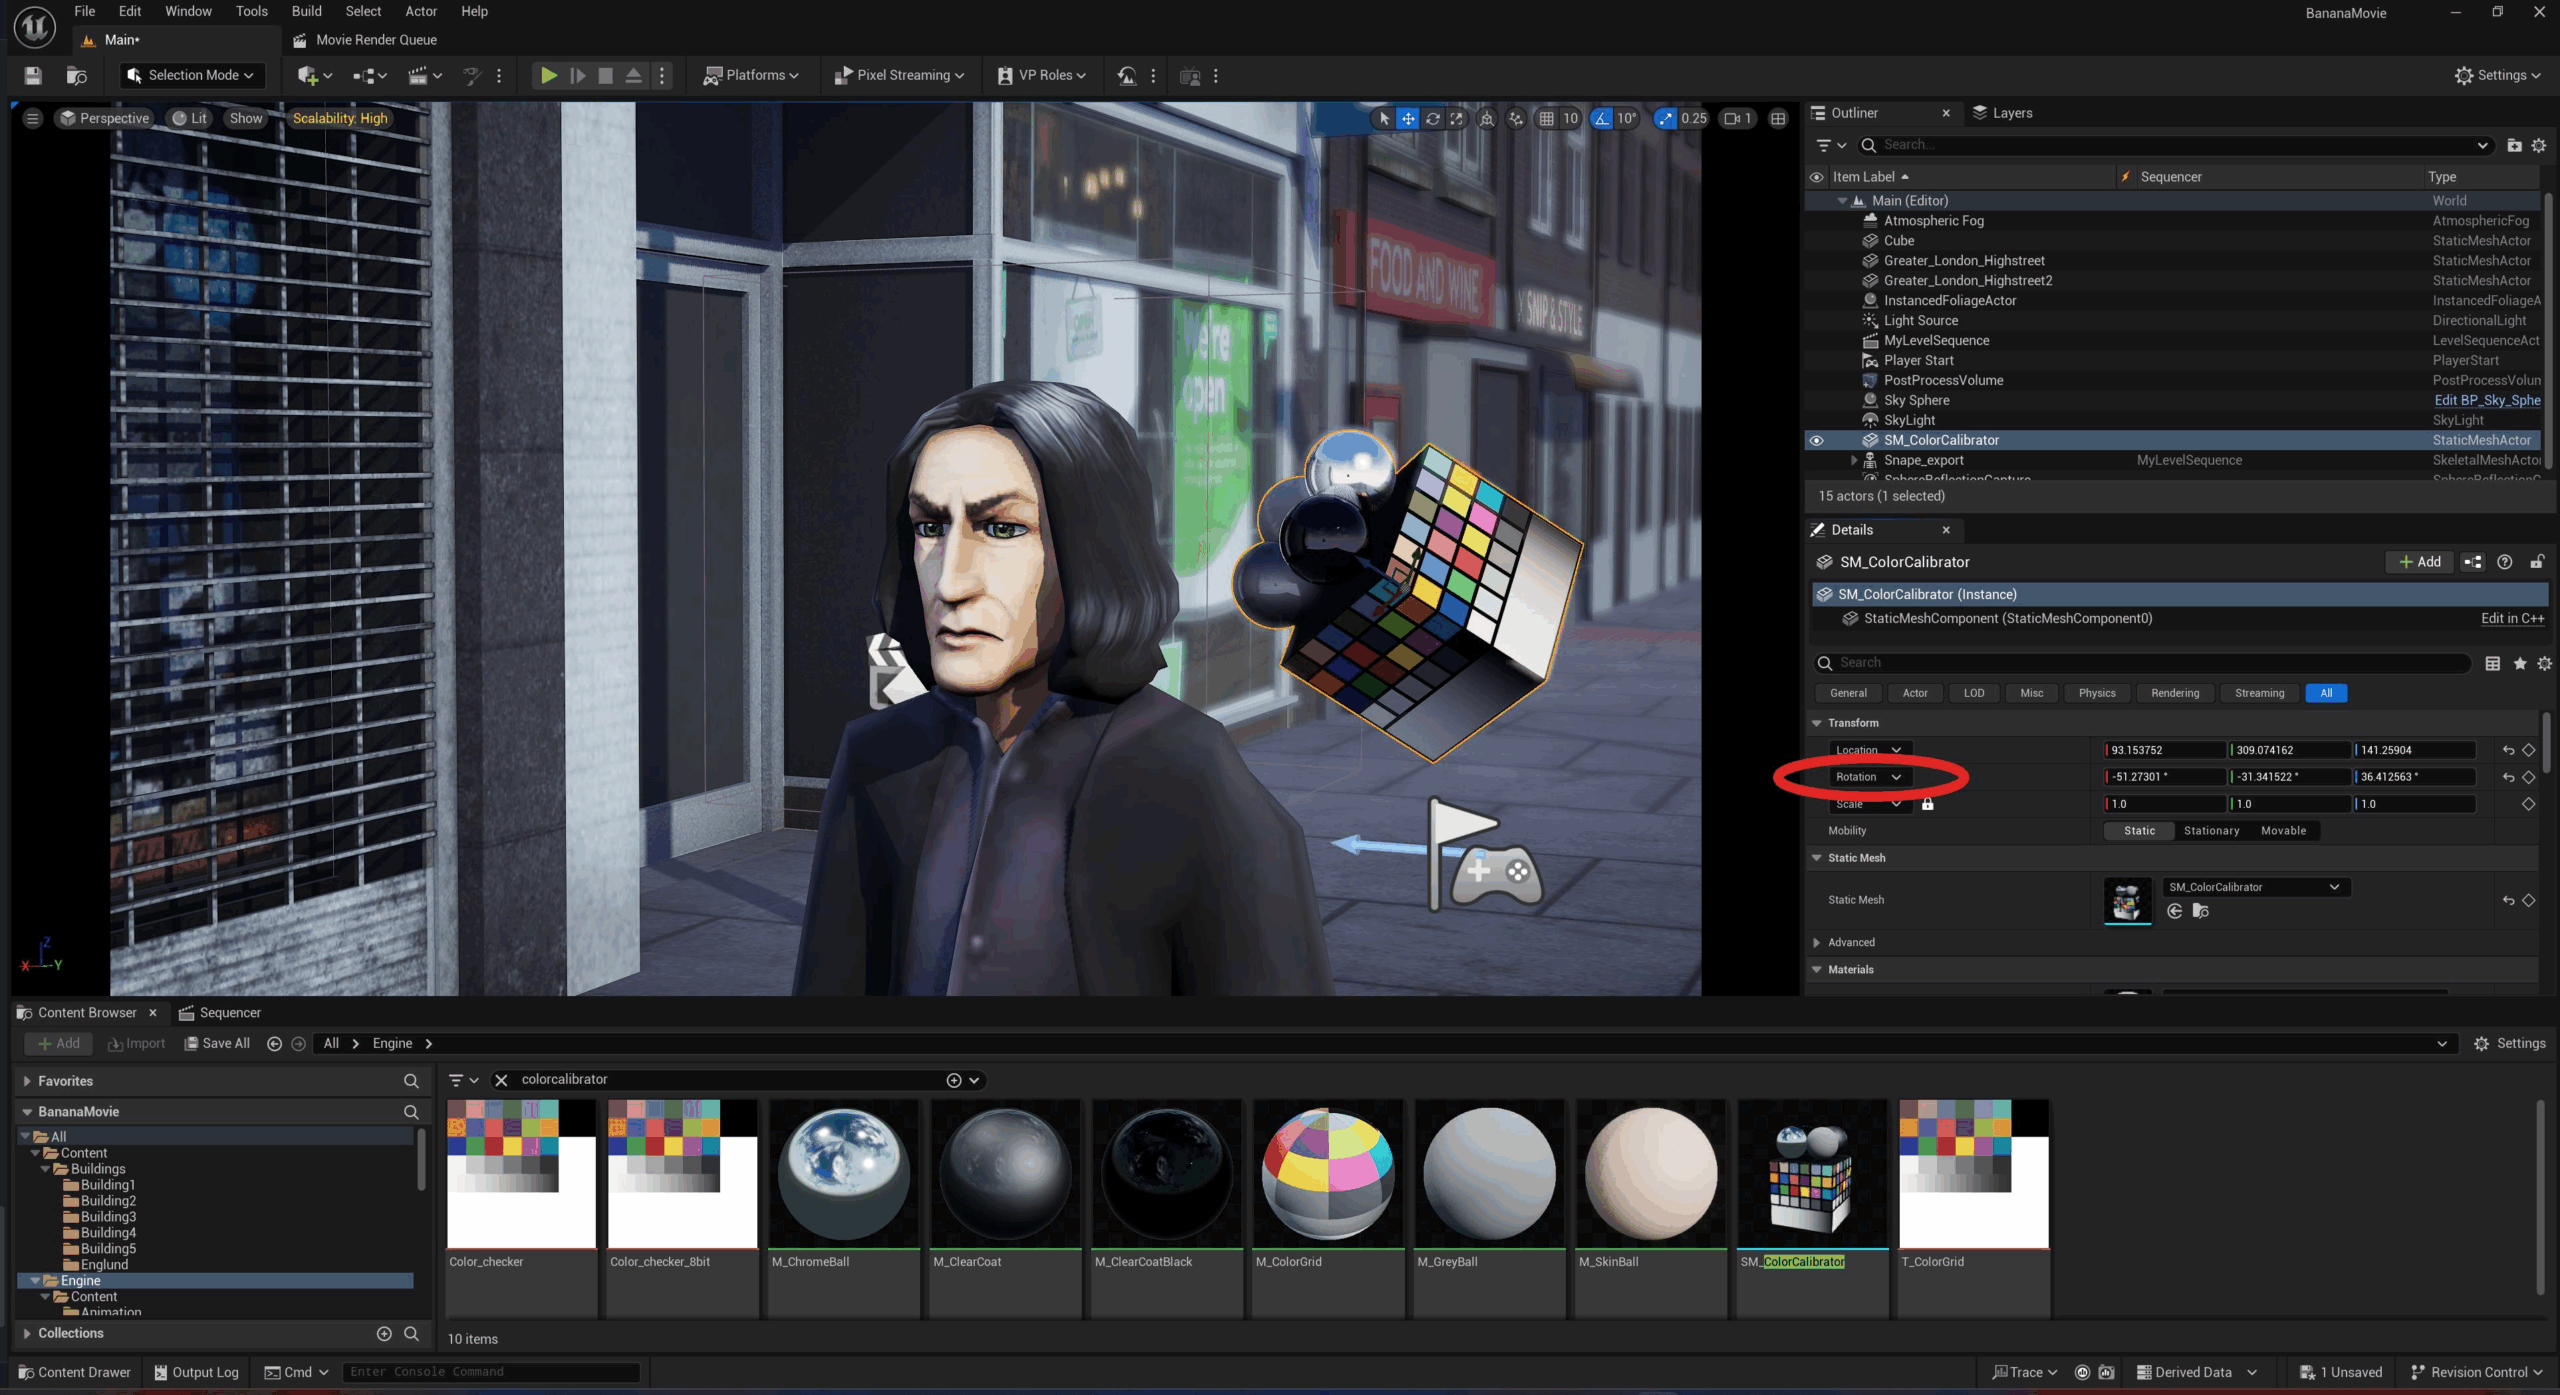
With our ColorCalibrator in place, let’s now take a screenshot and open it up in Photoshop (or whatever other image editor of your choice).
Looking at the face of the ColorCalibrator that’s directly facing our DirectionalLight, take note of the grey square that’s third from the right. This is our middle-grey value.
Try colour-picking here, and then have a look at the L value of the color – it should ideally be around 50% (50)!

Checking for middle-grey
In linear colour space (i.e. greyscale), your middle-grey value should be at 18%.
In sRGB colour space, your middle-grey value should be at 50%.
Our L value was 70, meaning our image is a bit overexposed.
Hop back into UE, select your PostProcessVolume and lower the Exposure / Exposure Compensation value (I found that a value of 0.1 did the trick).
Now screenshot again, open it up in Photoshop and check for middle-grey again!
Repeat this process until the middle-grey is around 50%.